Peripheral vision

This last one is my favorite. Start on one leg or tandem stance and begin to look far into the distance about 100 meters. While staring at one spot far in the distance start to take notice of everything in your peripheral vision. Call out what you see, but do not move your gaze.

~ Emily Splichal from, https://barefootstrongblog.com/2021/04/19/balance-the-basal-ganglia-the-power-of-eye-movement-exercises/

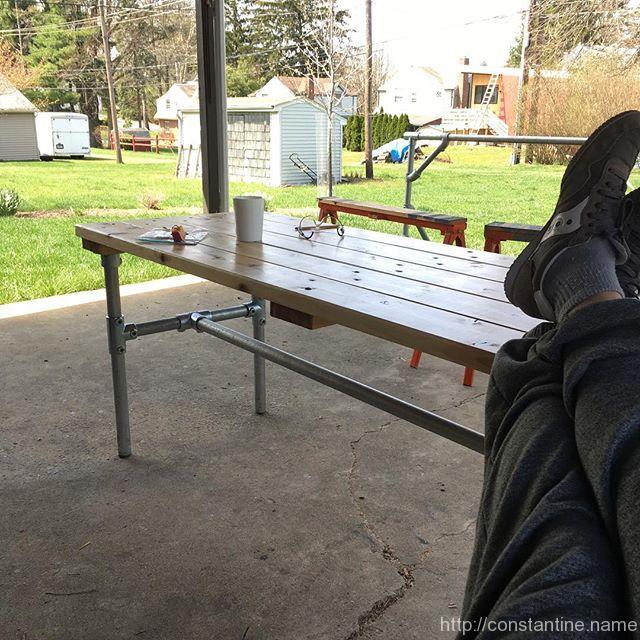
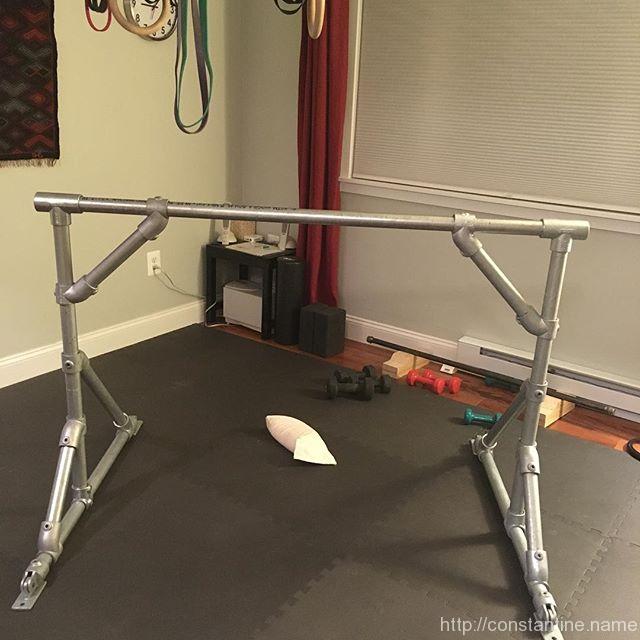
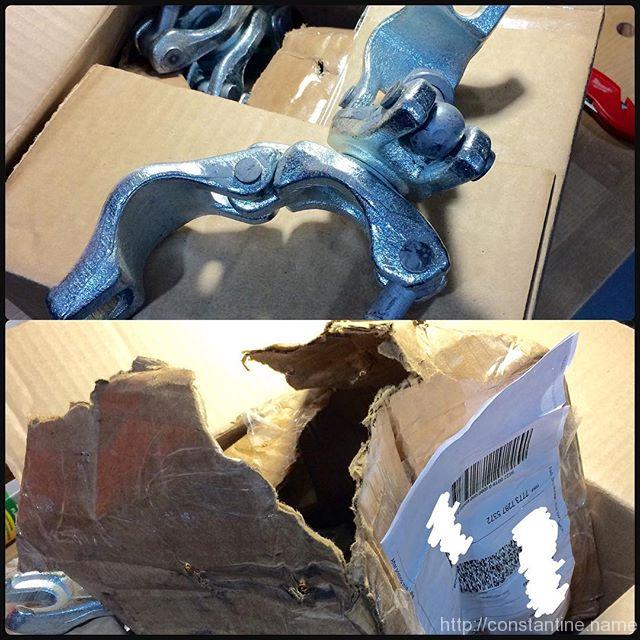
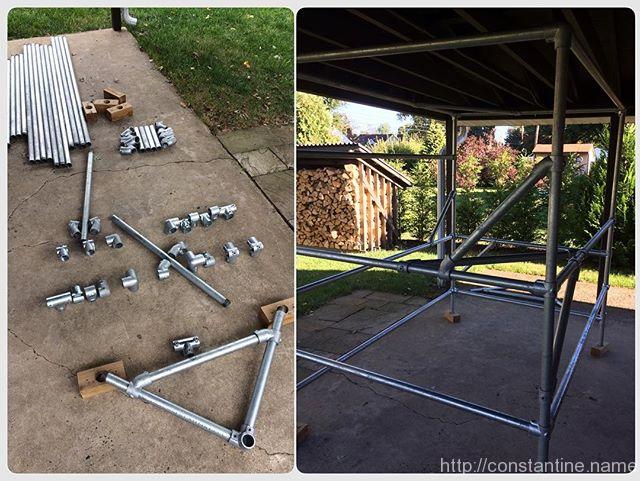
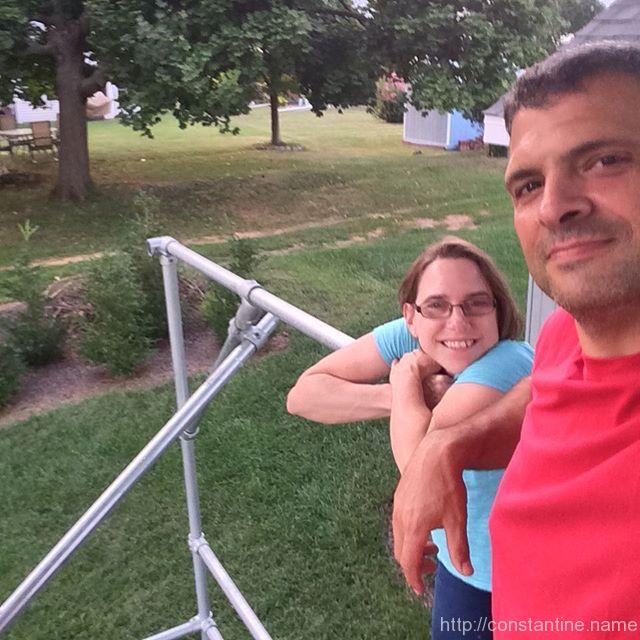
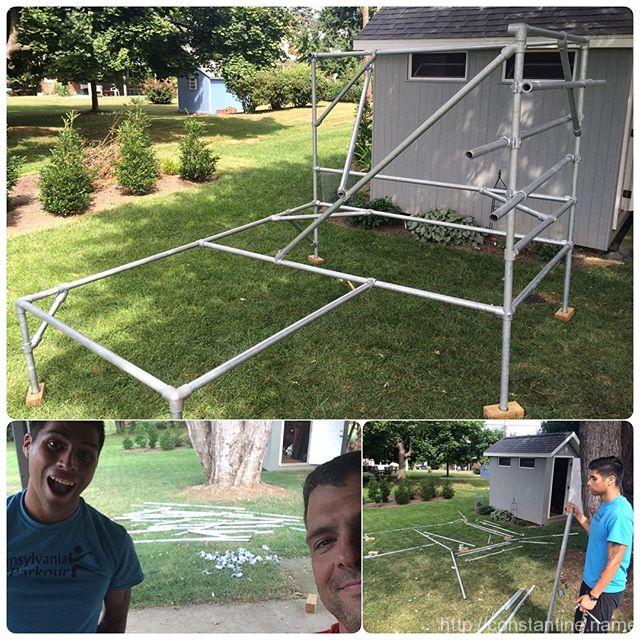
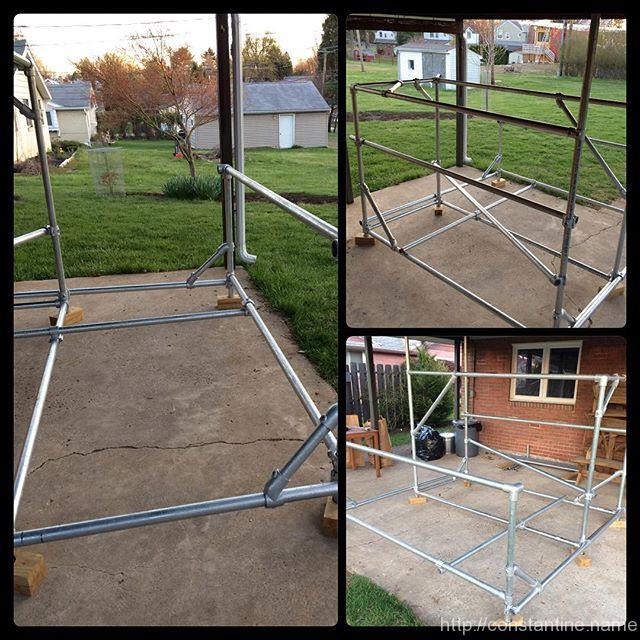
Frequently, I perambulate through the enormous amounts of information I’ve bookmarked—in every sense of that word. Often I read things which cause me to discover some new thread of thinking. But just as often I find things that simply make me go, “hmm, that’s interesting.” So tomorrow I think I’ll assemble some pipe scaffolding to make something upon which to balance, simply so I can try this exercise.

ɕ

Swivel pipe clamps

EIGHT. DOLLARS. I found a place which sells these online for 8 (eight, EIGHT?!) dollars each. Sure, it took forever to get here, their box exploded and FedEx apparently had to re-box and re-label it. But EIGHT dollars? So, uh, bribe me if you want to buy clamps from this site before they figure out they have these priced wrong… *scurries off to play with clamps* (This is probably like that time when that well known Scotch-selling web site based in England finally figured out that it’s illegal to ship alcohol to Pennsylvania… after I ordered from them a bunch of times :P

ɕ

Keep on keepin’ on!

(Part 58 of 72 in series, My Journey)


Keep on keepin’ on!: I’ve filled in the rest of the bars and this thing now needs a name. Until you’ve tried moving in a complex space, you won’t know how supremely capable the human body is; shoulders, grip, torso, knees, feet, vision, proprioception, spacial mapping… that meat-frame your mind lives in is meant to M. O. V. E.

ɕ

Live bait

7′ pull-up bar, “water fall” bars, 7′ long clear railing, gap challenges, adjustable precision bars… my new live-bait trap for scaf-loving humans. There’s an LVPK women’s event tomorrow (Saturday)… so I’ll be investigating this beastie! Who’s in?

ɕ

Working on bar precisions

(Part 48 of 72 in series, My Journey)

I’ve been doing a lot of rail precisions (approaching 5,000) as part of my “10k reps” project. The goal is simply to do 10,000 rail precisions — not at any particular height or distance, but to simply get comfortable landing on rails.

But on Saturday, i spent a couple hours pushing the distance out…

ɕ

Scaf 101: Epilogue

(Part 12 of 13 in series, Scaf 101)

Closing thoughts, other random clamps and ideas.

A fist full of clamps

Here are three more clamps. The first two you will certainly end up with, eventually. The third one is just a fun, sort of, “what would you ever do with that?”

Split cross

This is your new best friend, the “split cross”. This is better than sliced bread. This clamp can be opened (by tapping one of the pins out), and then placed onto an existing pipe in a structure. Note that the pins are slightly tapered. You’ll see they stick out on one side (that’s the thick end) and they are flush on the other (that’s the thin end, the end you tap).

IMG_1537

With these clamps, you can add another pipe, like this, when someone says the top one is too high…

IMG_1534

Or you can just throw a precision (or balance etc.) rail right into the middle of a build. I keep one, 10-foot-plus pipe laying around for this purpose. You can even strap on extra bars angled across the build if you bolt to the vertical poles. You can strap to two different horizontal poles, at different heights and make odd-angle slopes. There’s tons you can do with this clamp.

IMG_1533

90° single outlet

There’s a 90° single outlet tee which is handy for making really clean builds:

IMG_1536

Swivel mount

I have a few of these that I use as feet on my ground rails. Makes the pipes sit neatly on just about anything. But you could also attach these to big wooden blocks, and then use them as feet on the bottom of your scaf corners to keep it from sinking into your lawn. (Because of the set screw, these feet would move easily with the scaf when you pick it up.)

IMG_1539

The simple wooden feet are great, but in the lawn, they tend to flip over and come away when you move the scaf. So using feet that are attached to the legs would be slick.

IMG_1535

A few clamps more

Clamps are easy; point, click, ship. (Unless you’re lucky enough to live near a place that stocks them.) But as you accumulate more steel pipe, you’re going to want to start cutting it yourself.

…well, ok maybe you never end up cutting a single pipe yourself. If you buy your steel pipe from a supply house, you can just list all the lengths you want. But if you’re just going to buy a couple sticks at a time, then one day, you’re going to want to make a few cuts.

Ye ‘ol hacksaw is tedious, and the ends are never perfectly square. The gonzo method is to buy a chop saw and fit it with a metal-cutting blade. But the middle-of-the-road method is to buy a heavy duty “tubing cutter”. A steel pipe cutter will make short work of schedule 40, 1-1/4″ steel pipe. (But you will need to clamp the pipe down somehow to resist the cutter’s rotation.) For example, a “Ridgid 32820”.

The good, the bad and the clampy

I think I’ve done a reasonable job of capturing, and organizing everything (and more) that I’d wish I’d been able to find on the first day I started thinking about buying some scaf. Along the way, I had a lot of fun indulging my scaf habit and I hope you (fellow pragmatist) enjoyed reading this far.

Where to go from here? …to the clamp web sites, to the scaf supply depot, to your first scaf build party with friends!

On the other hand, if you’re in the mood to stare at your screen more, I have a #scaf tag for all the scaf posts on my site. They are mostly photos of built scaf, so perhaps you’ll find some ideas/inspiration.

Finally, a big shout out to Blake up in the Boston area for being a huge scaf-addict and spreading the scaf love. They don’t have anything scaf-specific on the web, but if you hunt them down on your favorite social medium or in real life, there’s pretty much scaf everywhere: Parkour Generations Americas Boston on DuckDuckGo

ɕ

Scaf 101: Build 6, Taller A-frame

(Part 11 of 13 in series, Scaf 101)

There are some non-obvious ways to use clamps to build unusual things. Early on, in the first “cube” build, I mentioned you could do pullups and work climb-ups. But this build is way better for building a stable, nearly 7-foot high bar.

There’s no layout shot per se, but here’s a pair of assembled 45° apex A-frames. (Note that the unused outlets in the middle both face up.)

IMG_1512

There are two 90° two outlet tees in the middle of the photo, 45° tees on the left and right and 3-foot brace pipes. This looks totally asymmetric, right? Here’s a close up of the tops of the A-frames:

IMG_1513

(I know, right? Does this work?)

Here’s a detail of how you put the top cross bar into the clamps; do not over-insert the ends because we need the width to be correct.

IMG_1517

Wait, this is a thing? It totally is…

IMG_1515

Very tall, very stable for climbing/hanging and you can swing a bit (if you like sketchy swing sets).

We have 5-foot pipes and tees left, so let’s add some more side pipes:

IMG_1516

I love how the outlets on those tees we used early on, suddenly are just perfect for a cross bar. Obviously, that lower one could go anywhere on the set. If you have extra 45°s, you can add some 1-foot diagonals on any (not the top – won’t work up there) of the cross pipes. I’d put two diagonal doing down from the mid-height cross-pipe; that would give a huge stability gain without being in your way.

There are other variations to this build: You could have used 5-foot pipes for the cross-bars when you laid out the A-frames. They’d be much lower down on the sides. You’d still have the fourth 5-foot pipe to make that mid-height cross-bar. And of course in both variations you have 3-foot pipes that can be added as diagonals if you have the extra 45°s. Remember the rail precisions build, with the diagonals that were “off” but still sort-of fit? You could get a 3-foot diagonal up on the top most cross-pipe.

I really like this build. It’s a sort of “sleeper” build where you start feeling like your wasting clamps at the apex of the A-frames and then it turns into this very unusual geometry. Most scaf (except of course Blake’s scaf in Boston) ends up being all 90° and 45° systems.

ɕ

Scaf 101: Build 5, A-frame swingset

(Part 10 of 13 in series, Scaf 101)

By now, you should be pretty comfortable with these builds. So for this one, I’m going to start off by making a poor decision, so you can see how it doesn’t work out at the end. Then I’ll make a change and show it rebuilt.

Here’s a layout shot for one A-frame end of a “swing set”. If you look at the apex closely, you’ll see I was considering using a side outlet elbow. (Two 7-foot legs, and a 3-foot cross pipe.)

IMG_1487

At which point I thought this might be an interesting teachable moment. So I swapped in the 90° two outlet tee. This seems like a good idea right? We’re going to use a 5-foot pipe across the top, one end of it has threads, I can slide this clamp further in from the end and it’ll get a much stiffer top corner.

Advanced: If you have the extra 45° single outlet tees you could add awesome little 1-foot braces on two of the corners at the top too. But DON’T – spoiler – we’ll use the 1-foot pieces for something else at the end.

IMG_1488

So I assembled one A-frame side and put in the 5-foot top pipe. You can see the other A-frame side is also assembled on the ground. The 7-foot pipes in this set all have threaded ends, and I’ve left them all facing down so the A-frame top clamps are more stable.

IMG_1489

And here’s the assembled A-frame swing set. It’s about 5 feet high and is surprising stable because of the very wide 90° angle at the top.

IMG_1490

So can we make this more interesting or more stable? Let’s put a 5-foot base across the bottom of one side, just to stiffen it up. (But it can also be a laché precision target too.) Two elbows, a 5-foot pipe, and you’ll see the 5-foot seems long, so bury as much of the pipe’s ends in the clamps as you can. You get this:

IMG_1492

IMG_1493

IMG_1494

We still have two elbows left, so we could do this on the other side and call it a day. But we also have two more 90° two outlet tees, so maybe we could put a bar, across the other legs, but up higher; just to make it interesting? Here you realize that using the two 90° two outlet tees on the top of the A-frame means the entire thing is too narrow to pull this off. In the photo, I have the far side clamped, and the near side just snugged and resting so I could take the photo; it’s clearly too long. If you slid this down low, you could just stretch/spread the legs, but up at this height, it’s a no-go.

IMG_1497

At this point (if not sooner) you’d realize that you cannot get those top clamps out and swap them. You have to tear the entire thing down; thus my thought that this would be good to show, so you never have to do it. :)

Here’s a do-over layout shot for the clamp change, and the finished do-over (with that low base with elbows installed).

IMG_1499

IMG_1505

Now we can add some fun stuff. You can use the two outlet tees (you have four left) to put a base on the other side (note the clamp orientation).

IMG_1506

But we have that on the other side already, so you can flip those clamps and position this 5-foot pipe anywhere. You have a “window” on one side too!

IMG_1507

We really should flip the elbows on the other side, so they “sit” into the feet better. Now we also have a “ground rail” on one side. Perfect to start from before jumping/reaching to swing on the bar, or as a laché landing target:

IMG_1508

Done? …not hardly! We have clamps left over. Grab that last 5-foot pipe and your four 1-foot pieces, two 90° two outlet tees, and you can make a bomber ground rail (because you made all 8 wooden feet way back when).

IMG_1509

IMG_1510

Finally, you still have two 3-foot pipes left. If you have the extra four 45° single outlet tees, you could add those pipes in somewhere. As diagonals to the base, or in the window, or something crazy like connecting the free ground rail to the A-frame somehow.

So this build ends up being full of options. Climbing/gap challenges around the side braces; balance/cat-on-a-rail challenges; precisions; swinging. This is one of my favorites that you can build with this set.

ɕ

Scaf 101: Build 4, rail precisions

(Part 9 of 13 in series, Scaf 101)

This is a very stable, adjustable setup for learning rail precisions close to the ground.

Here’s the layout shot. The 1-foot pieces will be vertical.

IMG_1453

In this build, I’m going to use 3-foot braces incorrectly; I’m going to build them out-of-plane, where all the angles are just a bit off. Turns out it’s close enough to work because the brace pipes are 3-feet long. This wouldn’t work with shorter braces. (Look at it closely when you put it together to see what I mean.)

Here are closer layout shots of the two types of corners in this build. First, a corner with a brace:

IMG_1454

…and the corners without a brace. The upper clamp that holds the precision rail has an extra outlet we won’t be using.

IMG_1455

Put the 90° two outlet tees on the 7-foot bases. This is a little trick to make the pair on each pipe have matching alignments. This also makes their set screws super easy to tighten. Set the distance between the clamps (on each pipe) to be the distance of the precision you want to end up with in the finished setup.

IMG_1456

Put all the verticals in place. Since each of the elbows has an outlet I’m not using, I’ve turned them out/away from the jump-gap.

IMG_1457

Put the cross bars (the ones you’ll jump on) in place, and build the 3-foot braces. You can adjust the distance by loosening 3 set screws and sliding one side. (Another spot where you can use the wooden feet to prop up the ends of the 7-foot base pipes so yo can get at the set screws that are on the ground.)

IMG_1464

Minimum is about 2-feet, limited by the angle braces:

IMG_1462

IMG_1463

…maximum is nearly 7-feet. If you never plan on going out to seven feet, you could also do the build using the other 5-foot pipes as bases. (Sorry about all my other scaf pipe sneaking into the shot. All of these builds I’m doing with just “the set” described in the beginning.)

IMG_1465

ɕ

Scaf 101: Build 3, parallel-sorta-bars

(Part 8 of 13 in series, Scaf 101)

This is another variation on the cube (the next build I’m going in a totally different direction ;). basically, take the 7-foot side pipes and turn them into stabilizing legs, so you can do some limited laché (there’s a better build for that though), pullups, climbing and under-bar stuff.

Here’s the layout shot:

IMG_1470

Assemble the ride side (which will be vertical). Do the two uprights and the top 3-foot first. Note the 45° single outlet tee on the righthand vertical.

IMG_1472

Next, clamp the verticals to the 90° two outlet tee (we’re not using one of its outlets though.) Then clamp the 90° two outlet tees to the 7-foot base pipe. I just eyeballed the centering.

IMG_1473

Stand this side up, and put a 7-foot pipe into one side. Remember to slip the other 45° single outlet on here. (Again, I snug these clamps down a bit so they don’t go sliding.)

IMG_1477

Assemble the other side; verticals, top pipe and bottom. Remember the 45° single outlet on the opposing vertical. Position the two assemblies like this:

IMG_1480

Stand up the side, lift up the 7-foot pipe and convince them to line up:

IMG_1481

Fiddle the other 7-foot long side pipe into place. Make up both braces. (Bonus, if you have the extra 45° single outlet tees, you could add two more braces to this build.) Stick the feet on it (otherwise the 7-foot base legs don’t actually touch to add stability – but you could shim them with whatever.)

IMG_1484

I took the above shot at about eye level – obviously, it’s a 5-foot tall setup. And stable enough to do climbing and some gentle swinging.

IMG_1485

ɕ

Scaf 101: Build 2, railings

(Part 6 of 13 in series, Scaf 101)

This is simply a slight variation on the “cube” build. You can either assemble it this way, or slide the 90° two outlet tee clamps along the vertical legs when you’re done with your cube.

In the cube build, when you’re assembling the upper frame – the second half of the build – simply lower the position of the 90° two outlet tees. Alternatively, you can convert the cube into this by loosening the 90° two outlet tees on the four corners and then slide the frame down the verticals. (Truth be told, I had to coerce the frame down with a rubber mallet.)

ɕ

Scaf 101: Build 1, cube

(Part 5 of 13 in series, Scaf 101)

This first build is the most obvious thing to assemble and you can do a lot with it. (Yes, it is not actually a cube; I suppose it’s a right cubic rectangle.) I’m going to give a TON of detailed instruction on this build with a million photos. On subsequent builds I’ll be brief.

Advanced: As I’m assuming this is the first build you have ever done, I’m keeping the diagonals to only two. However, if you bought the four extra 45° single outlets, you can add two 1-foot diagonal braces to the mid-sized sides. I’ll mention how to do this as we go along.

Prep

Begin by clamping the four 3-foot pieces into the elbows. Note that the threaded ends go in the elbows.

IMG_1518

Notice the orientation of the clamps. The two set screws that will be used later, are facing the pipe. You’ll be happy these screws are facing up a few steps from now.

IMG_1519

Why are we putting the threaded ends in these clamps? You’ll see why when we clamp the other ends of these pipes. For now, recall the discussions about inserting the pipes a little farther so the body of the pipe – i.e., not the tapered threads – is touching the inward land in the clamp.

IMG_1520

The bottom

Introducing the “layout” shot. I find it really helpful to lay everything out (until you get really good at scaf) so you can see that you have all the pieces you need. This is just a partial layout; it’s obviously not all the scaf for this build. In later builds, I’ll take an entire layout shot so you can see the mess. I think the layout (looking at a photo before it’s built) helps you visualize how you convert the loose junk into the finished product. Anyway, here’s the layout shot for the first corner:

IMG_1391

Of particular interest in the above shot: I’ve slid the two 45° single outlet tees onto the side pipes. That’s a 7-foot pipe on the right, a 5-foot pipe on the left, and the cross brace is another 3-foot pipe.

Below is, basically, another layout shot. Notice that I’m putting the threaded ends of the side pipes into this clamp. Can you guess why?

IMG_1390

This is a hair splitting detail to deal with the fact that this pipe has threaded ends. This clamp already has the first pipe pushed a bit into the center space. So the next two pipes are not going to be able to be inserted extra to get their non-threaded bodies to the lands. (Boo!) But this problem has to happen somewhere in the build, right? So I’m doing this here, where there is a corner brace that will beef up this corner. Because all the pipes have one threaded end, this “fixes” two of the twelve threaded-end problems in this build.

Advanced: Turns out we’ll have both ends of the 3-foot pipes occupying the clamp bodies. So all of the 5-foot and 7-foot pipes’ threaded ends aren’t going to land perfectly. (Because, taper.) So, if you have the extra 45° single outlet tees, you can add a brace on each of the 3’x7′ sides. That will brace two more (one per each brace) of the remaining four threaded ends. Again, I’ll explain more as we go along.

Next is a finished shot of this corner assembly. Here you’ll see another reason why I love those wooden feet. Things like this are so much easier to assemble with the feet doing a little propping up. Note that this prop trick doesn’t always work. It’s handy here for this brace, but after this, the setup has to stay flat on the ground. We’ll do another angle brace soon, and it will be on the top face, so no need to prop it up.

IMG_1395

The next photo is the layout shot for the rest of the parts for this “lower” part of the cube.

Please notice that the next few photos incorrectly have the vertical 3-foot pipes with the threads out. Right after I took these photos, I realized it would be better with the threads in – which is how it’s described above, to this point. So I flipped the pipes around… and promptly forgot to retake these photos. When I realized these shots were wrong, I didn’t feel like doing the entire build all over… because this space is already full of other scaf. :^P

IMG_1396

Advanced: If you have the extra 45° clamps, and want to add a brace, you should add a clamp where I have the red arrow. That’s the end of the 7-foot pipe that has a thread, and would most benefit from bracing. The clamp should angle towards the corner, since you’ll put the other clamp for this brace on the 3-foot, vertical pole. I’m splitting hairs here about where to put braces. But, this is meant to be educational, ‘ya know?

IMG_1396

The next photo shows two more verticals, and the 7-foot side clamped tight. Just the fourth vertical, and the last, 5-foot side remain to be installed.

IMG_1397

At this point, insert the 5-foot pipe into the clamp (the one towards the top of the photo.) The pipe, of course, will just lay there when you let go. Then clamp the fourth vertical to the pipe. (That’s the clamp/set-screw where the Allen wrench is laying.) You’ll have enough swing/wiggle in the 5-foot for this to be easy even with one hand always on the vertical pipe.

IMG_1398

Why? Diatribe about safety: Yes, this build is pretty harmless. But as you build bigger things, you will live longer if you are always thinking, “when I forget and let go” or “when I slip” or “when I get stung by a bee and drop this part”. At this instant in the build, that fourth vertical looks like it’s attached – it’s clamped to the 5-foot side pipe, but the pipe is free to rotate but you cannot tell at a glance. The vertical may even stand for a while before falling over. This is exactly how someone gets hurt. Something that looks stable, actually isn’t clamped yet.

Now tighten the other screw on the vertical pipe’s corner clamp which fixes the 7-foot pipe into this corner.

Anything else? Yeup, the other end of that 5-foot pipe. Learn to keep track of what’s tight. Learn to spot proud set screws that need to be tightened (or whose clamp alignment needs fixing so the screw goes in farther). While you’re at it, give the structure a couple shakes, and then go check every set screw.

Pro-tip: Soon you will have a feel for “this is how much I torque these things” and you’ll go around and just sort of torque torque torque them quickly. In an instant, you can apply “just that right amount of torque”, and when the screw doesn’t move, you’re happy. This is another way to spot good scaf builders: They do not go around and actually tighten each screw a little bit more each time. (The screws cut hickies the tighter you make them.) Good scaffers know what a tight set screw feels like before it moves.

Mastery-tip: The set screws scratch the steel pipes and move the Zinc coating. That leads to a tiny bit of corrosion between the pipe and the screw, which makes the set screw stick in place. That’s a good thing because it helps prevent things wiggling loose. So if you’re in the habit of actually moving each screw when you periodically check things, then you’re messing up the one time when corrosion is actually working in your favor.

So, here’s what you have, everything tight and ready for the upper frame (except, of course, your 3-foot verticals are not upside-down like mine are in the photo):

IMG_1399

Advanced: If you’re doing the extra brace, you need to drop the second 45° angle outlet clamp onto the vertical (arrow). Later – no, do not do it now – we will install a 1-foot brace where the line is.

IMG_1399B

The top frame

Attach two of the 90° two outlet tees to the tops of two diagonally opposite vertical pipes. Be sure the pipes are inserted far enough so the cut off end lands correctly.

IMG_1404

This is why the 3-foot pipes are threads-down. If the threads were currently UP, well, the threads would have to stick out. On the other hand, if you assembled this entire thing with the threads UP, when you flip it over, those threads would be PERFECT for dropping into those neat wood feet. This is how I actually set this cube up when I use it flat. I DON’T put the thread into the clamps at the very first step and then I flip the entire build over and use the wooden feet. It’s actually just like the “railings” build that we’ll do next. But I’m getting ahead of myself.

Anyway, here’s the status shot with two clamps on two of the verticals:

IMG_1406

Here’s another layout shot showing the 7-foot pipe (with 45° single outlet tee) and the 5-foot pipe that will be added next. Notice I’m putting the threaded end of the 7-foot pipe down where the second diaglonal brace will go.

Advanced: The second 1-foot diagonal will go on the last 7-foot pipe, on the other side.

IMG_1414

Another diatribe about safety: Loose clamps on poles lead to the “sliding death clamp” problem. You’ll experience this some day. You’ll pick up a pipe, and somewhere on the part that is NOT in your field of view, there will be a loose clamp. You’ll hear the sliding sound of a clamp… and you have a split second to figure out if the clamp is coming your way and about to pinch your fingers on the bar, or if it’s going the other way and going to hit someone else. Bonus points: if the clamp falls off, the pipe balance changes quickly and you have the slap-stick, not-funny, swinging pipe joke.

…so when you put “middle” clamps on pipes that you are going to lift or carry, snug their set screw so they don’t move.

Pickup one of the 90° two outlet tees in your right hand. (Bear with me, this is clever.) Stand inside the setup, pickup the 7-foot pipe and put the left end (with the threads) into the corner clamp:

IMG_1417

Drop the clamp onto the vertical pipe. This is not how we’ll install this clamp, I’m just using it as an extra hand. If you’re paying attention, you’ll realize this entire build can be done by yourself perfectly safely. (Nit-picking: I was also holding a camera through all of this. I should have flipped that clamp so the screws were on the other side… you’ll see in a moment.)

IMG_1419

Boop! I no longer have to hold that 7-foot pipe; it’s trapped on both ends. Now go to the other end – the end we inserted first – and lock it in place with the set screw. We don’t want it coming out, and we may need to pull on it in a moment.

Next, pick up the 5-foot pipe and put the right end into the corner clamp:

IMG_1420

No photo for this part, but: Rest the left end on top of the 7-foot pipe, and then lock the right end of the 5-foot pipe into its corner. Like the 7-foot pipe, we may need to pull on it and we don’t want it coming out.

Now, holding the 5-foot pipe in your right hand, lift the 7-foot pipe and the clamp – and here I had to stop and flip my clamp, but you can just – rotate the clamp to receive the 5-foot pipe. (Happiness: You can’t drop either pipe because their out-of-sight ends are already locked in.)

IMG_1422

Line them up holding the clamp. Since we had the forethought to already clamp the other ends, the other ends won’t fall out on us as we wrestle this part.

IMG_1423

Now this gets tricky. You may have to coerce the vertical pipe to come over and want to go into this clamp. (If you’re doing the advanced version, the extra 1-foot brace would fight us at this time.) Eventually, you get this:

IMG_1425

Now tighten up all three screws on this corner clamp.

Advanced: Now you can assemble and tighten the 1-foot corner brace that is on this vertical pipe.

Finally, you now have half of the upper frame:

IMG_1431

Place the last 5-foot pipe into the right side; Put the threaded end to your right (towards the braced corner.) Notice the 45° single outlet tee clamp for the top face’s corner brace is on this pipe. Use the last clamp to hold the end for you. Tighten up the far end of the 5-foot pipe. (We’re going to be pulling/pushing on this pipe like we did on the other corner.)

Advanced: If you’re doing the extra 1-foot braces with your extra 45° single outlet tees, drop the one of the 45° brackets onto the vertical pipe angled upwards.

IMG_1438

Advanced: 1-foot corner brace? Slip your last 45° single outlet onto the 7-foot pipe, angled facing the vertical.

Slip the left end (farthest away in the next photo) of the last 7-foot pipe into the far clamp. Rest the pipe on the 5-foot pipe or temporary clamp, and tighten the far end.

IMG_1439

Pick up the 5-foot pipe and the clamp with your right hand, rotate the clamp to accept the 7-foot pipe:

IMG_1440

Make up the corner and coerce it into alignment:

IMG_1441

Tighten all three screws on this corner clamp.

Advanced: Make up that last 1-foot corner brace!

Finally, finish that 3-foot corner brace on the top face:

IMG_1445

Voila!

Flat: You can use it with the round-faced outside corners down (as you assembled it), or flip the slightly more rough 90° two outlet tees to the bottom, or (bonus points) assemble threads up so they’d be sticking up at this point, then flip it over so the threads disappear inside the feet you made!

IMG_1446

Side: Flip this way for 5-foot high climb-ups etc. You’ll learn how sturdy it is. (Answer: reasonably.)

IMG_1447

Tall: Finally, stand it up all the way for pullups or climbing challenges etc.

IMG_1449

ɕ