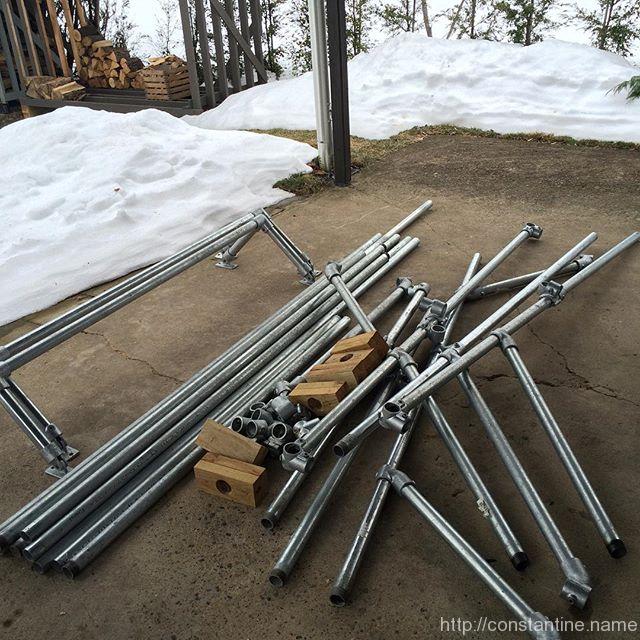
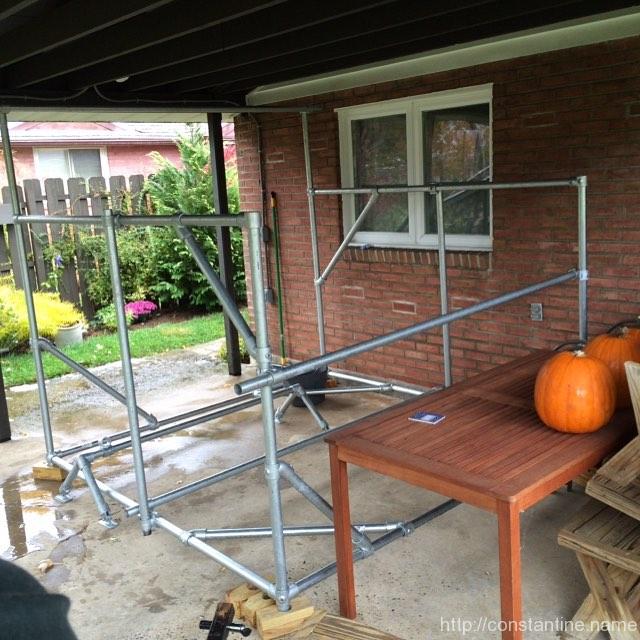
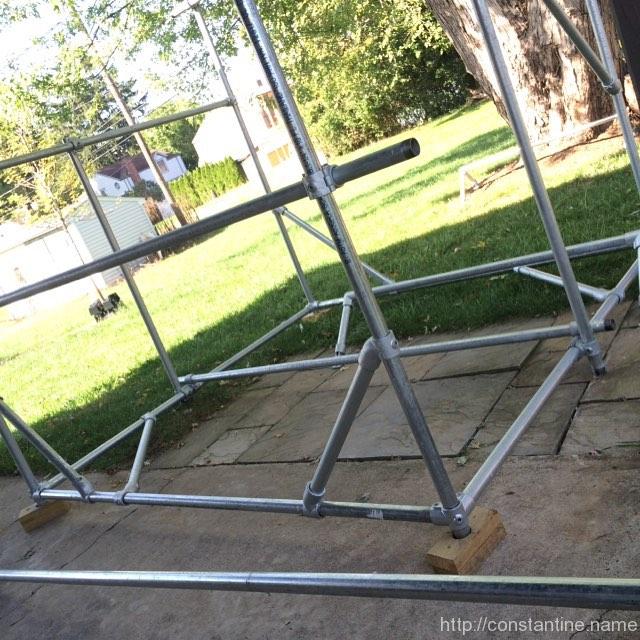
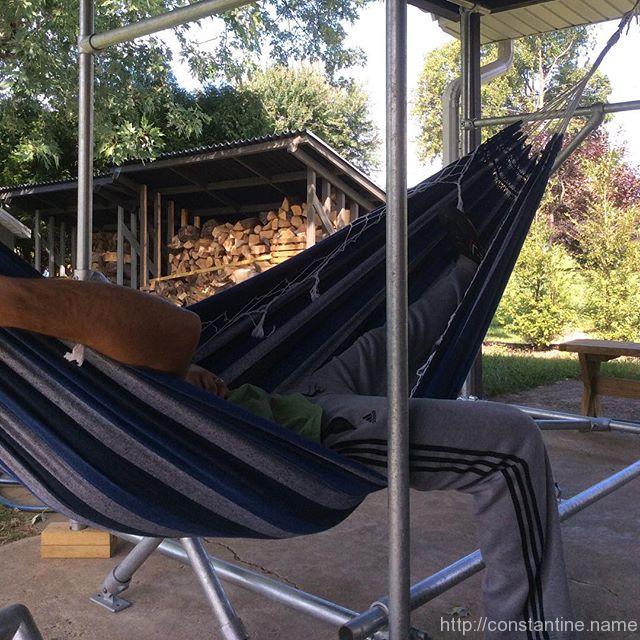
Scaf 101: Inside the clamps

(Part 4 of 13 in series, Scaf 101)

Remember when I said I’d start by explaining everything? Well, you should understand how the clamps work, so that you understand how to put them together. If you do it wrong, they wiggle loose and come apart surprisingly quickly.

Pro-tip: Scaf should be quiet! If you hear a rattle or tapping sound stop. Something is very loose — you probably forgot to tighten something. Or, you didn’t have things lined up correctly, then after the scaf is jostled a bit, things shift and voila! Loosey goosey. Learn to pay attention to your “scaf sense”. When your scaf sense tingles, stop and figure out what’s going on.

“omg Craig shut up already and let’s build something…” This is the last background information post. We’ll start building stuff in the next post. Please read this one carefully, this gets technical. But, if you understand this material, you’ll be a happy clamper later on.

Depth

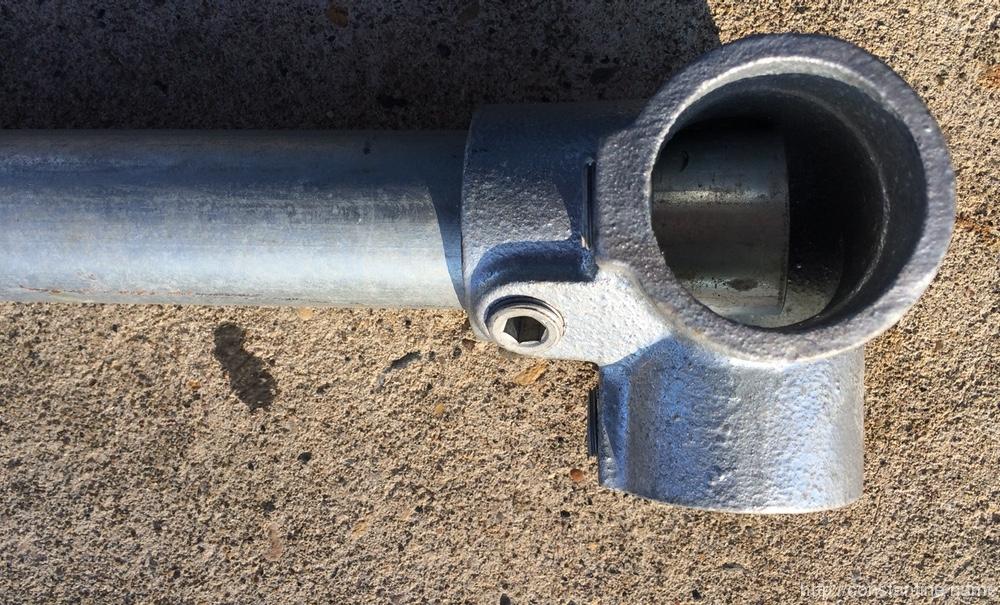
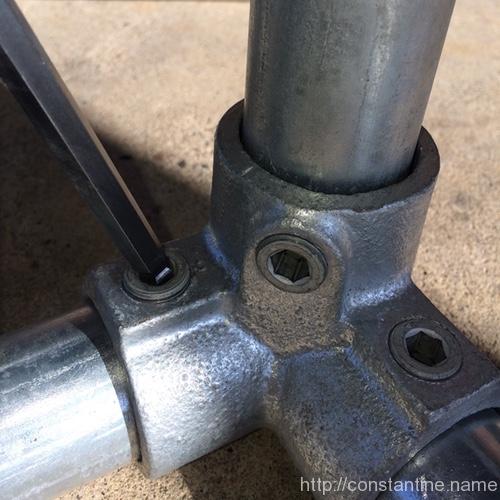
On some of the clamps, you can actually insert the pipes too far. Usually, it’s the first pipe that you insert too far. In these pictures, the first shows the pipe inserted so far that the end of the pipe has bumped into the curved body of the clamp. That’s too far! You can see how the straight line of the side of the pipe looks out of whack. Tightening the screw will not fix this; although it will get tight. You will have two problems: 1) The overly inserted pipe might be in the way of some other pipe’s space, messing up alignment/lengths. 2) Things don’t turn out square/correct because when you start tightening everything else, this clamp is fighting the additional angle added by the mis-aligned pipe. If you get it right, your pipes make nice 90° (or 45° or whatever) angles.

WRONG:
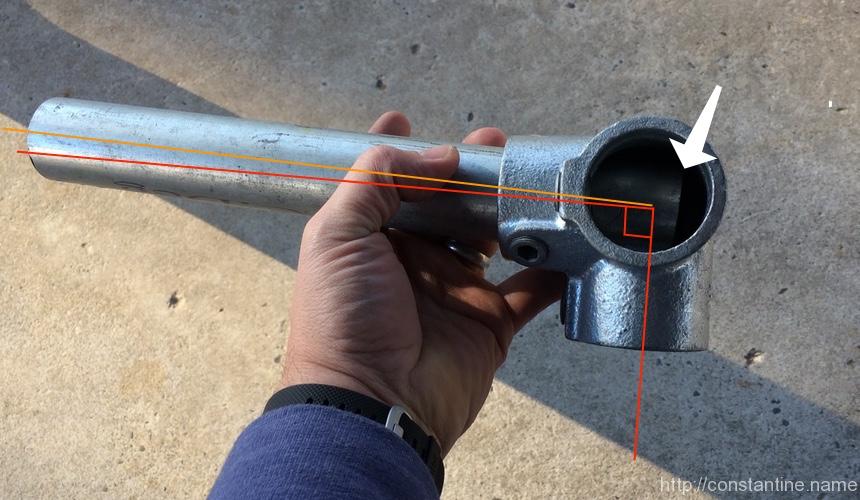
pipe_insert_wrong

RIGHT:

pipe_insert_right

Bear in mind that the problem comes up when you cannot really see the angle you’re making. You have to sort of feel that the pipe is inserted correctly, while holding a pipe up over your head, or holding three pipes at once and aligning the clamp. You’ll get the hang of it.

More depth

But wait, it’s worse. Next you have to be thinking about whether each pipe will interfere with the other pipes. So in the “RIGHT” photo above, the pipe is still inserted too far. Why? Well the pipe inserted from the bottom of the photo looks like it has enough room. But the pipe inserted from your point of view probably should go father into the body. Or maybe it shouldn’t; maybe all three pipes need to be equally inserted for this setup. My point being that you have to pay attention. First, pay attention to my assembly hints. Later, you’ll understand intuitively how “an extra pipe width here”, or “a half pipe width there”, adds up to make your assemblies fit, or not fit. If I have included a close-up photo that shows the ends of pipes inside a clamp, then I’m thinking the insertion depth is really important in that clamp. As we go farther along with these setups, I’ve assembled (and photographed) some mistakes on purpose, and I’ll show you how it ends up messing up the setup and how to correct it.

Lands

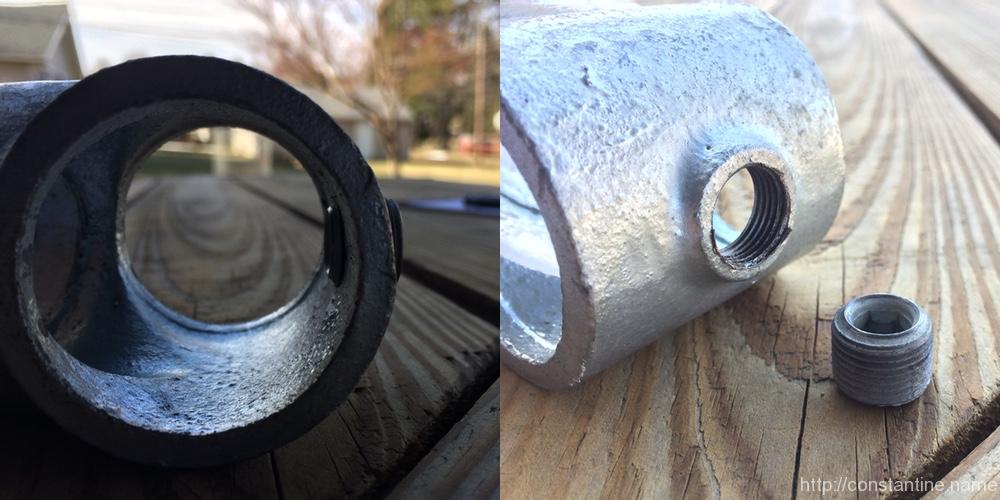
In machining, a “land” is the accurately machined part (of something) that some other thing is supposed to rest on. Pipe clamps are not machined (they are cast in molds) but they do have lands; the places where the clamp actually touches the pipe. In Kee Klamps, the lands are circumferential raised ridges on the interior of the clamp. Each set key presses on the pipe midway between the two lands; it’s like how you might press down on the middle of a board resting on two saw horses as you cut the end off. The set key is pressing in the middle, and instead of flat saw horses, the clamp has round ridges that cradle the other side of the pipe. Here are photos of some pipe lands:

IMG_1359

Above: One land deep inside the clamp is easy to see. The other land is at the very face (closest to you in this view) of the clamp. (The already-inserted pipe is surely in far enough to be over both of its lands; in fact, it might be in so far as to hit the clamp body and cause that alignment problem discussed above.) When inserting a pipe in this view, the set screw will drive the pipe upward until it touches both lands, at the top of the photo.

IMG_1375

Above: Lands are the extreme nearest and farthest sides of this clamp. Set screw is pressing from the right, so the pipe will touch the lands on the left. Also, the pipe will have to go all the way through (protruding slightly) on both sides of this clamp.

In the next photo is a similar clamp where the pipe is not through (upwards towards the viewer) far enough to reach the land at the top opening of the clamp. This pipe could wiggle loose. As it is now, tightening the screw will drive the pipe into the clamp body. It looks like the end of the pipe will touch the clamp body where the body is rounding from one side-out to the other side-out. There, the body is curved (convex) enabling the pipe end to wiggle; compared to the land (concave) at the pipe opening face which would cradle the pipe.

IMG_1403

Next is just another shot of a clamp, its lands and the set screw on the bottom. Remember, you have to understand, and insert the pipes correctly when you cannot actually see what’s going on.
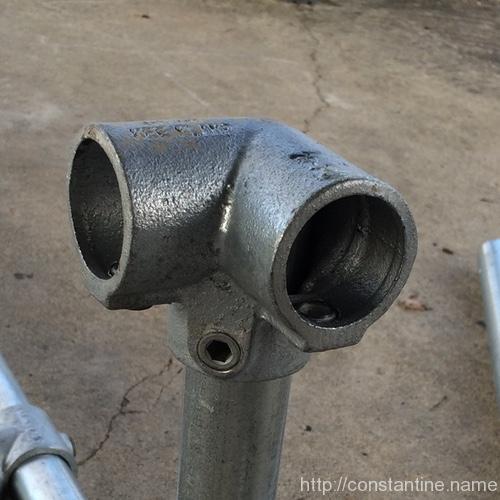
IMG_1458

Once you get the feel for this, you’ll recognize when you have it right. The pipe will be loose in the clamp initially. As you tighten the screw, the pipe will move to the opposing side of the clamp. Ideally, if you have it all lined up right, it reaches the lands at the same time (or things are loose enough that the clamp pivots easily to bring the second land into contact). When you do it wrong, you get one land, and the pipe hits the clamp body or the mis-aligned clamp just torques against the screw-and-one-land. That’s a recipe for wiggling-loose.

At this point, you should see why you don’t simply stuff the pipes into the clamps as far as possible and then tighten the screws. It’s all about having sufficient insertion depth to reach the lands.

Next is a photo of “this looks good”. It’s a good sign when all the space is on the side with the screw, and you can see the pipe is flush up against the other side (i.e., against the land). What you cannot see, but have to feel, is whether the pipe “registered” (i.e. “found it’s correct location”) when the end of the pipe in the clamp was driven to its land.

IMG_1364

One last item: Now that you know where the six lands in this clamp have to be, you understand how you could choose how far extra to insert the pipes. Any one of these three could be inserted (roughly) an extra half-pipe-width to occupy the central hollow of the body. Or, all three could be democratically not inserted beyond the interior land.

Mastery

In the next photo, you should now have an “a-HAH!” moment about why the threaded pipe ends are a bad thing. (Which, we’re only dealing with because this is “getting started with scaf on the cheap.”)
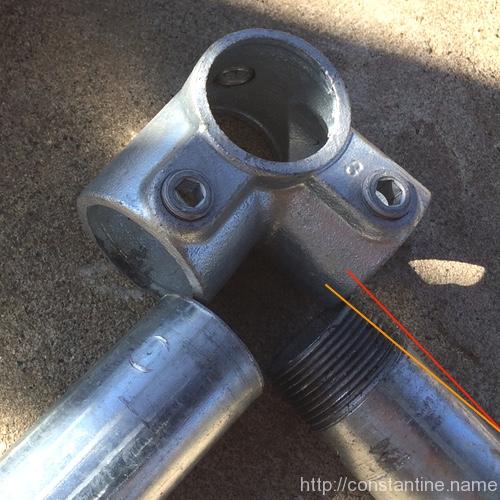
IMG_1488

I’ve drawn the red line parallel to the pipe’s side and offset a little so you can still see the pipe. I’ve drawn the orange line parallel to the threads (and offset a bit so you can see the threads.) Now, the pipe on the left could touch the inward land at the end of the pipe (because no taper). But the pipe on the right has it’s diameter reduced slightly by the thread cutting producing a tapered end. So if you put the threaded pipe in so the threads just reached the inward land then the pipe (or the clamp) will be pulled slightly on an angle as the pipe end has to be driven just a smidge farther to reach the land.

So it turns out that if you know this little detail you can do things like orient all the 3-foot pieces (which all have a thread on one end) the same way, and insert them all father into the clamp body so the unthreaded pipe body reaches the inward land. To do that you have to not insert some other pipe into the clamp and occupy the middle space. You’ll see an example of this in the first build. And this little trick about how to insert threaded ends just a little farther only makes sense once you understand lands and how the clamps work.

Look away, insanity ahead: So know you understand that pipe threads are bad for our scaf build. What to do? Easy, buy all your pipe by the bundle via freight without the threads. (Wee! …thousands of dollars.) Or, on the longer pieces where an inch doesn’t matter (you know, those 7-foot pipes Depot cut for you from 10-foot sticks) just cut the threads off the end of each pipe with a hacksaw. Or cut all the threads off all the pipe and deal with the fact that your scaf all has an inch missing here and there. Or, go full-on insanity mode, buy a lot of extra pipe from Depot, cut all your scaf pipe in perfect integral-foot sizes withOUT the threads, and recycle all the odd-sizes you end up with. (Bring the pipe home uncut, start with a 10-footer, cut off an inch, cut off a 7-footer, cut off a 2-footer, throw away the other few inches. etc. You can make a 9’10” stick, one-8-and-one-1, 7-and-2, 6-and-3, 5-and-4 if you’re willing to make a ZILLION hacksaw cuts.)

Whizardy

In the beginning, remembering which way to orient the 45° single outlet tees can be tricky (because they go onto different pipes at different times as you’re assembling). But beyond that, angle braces are actually pretty hard to assemble well.

Exercise: Let’s look at this photo and make some wild guesses about of what might be going on…
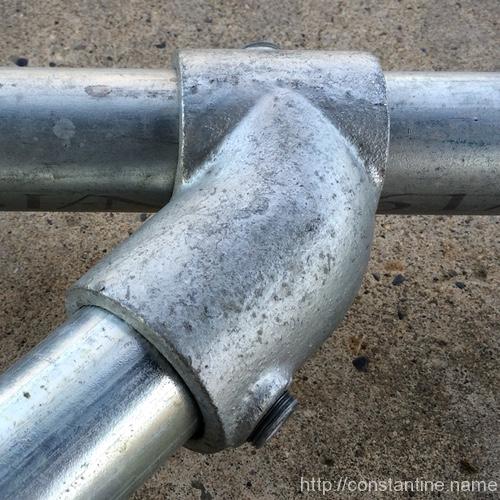
angle_braces_suck_actually

  • The set screw towards the bottom of the photo is snug. Gap is on the screw side. But probably not fully tightened because the screw seems to be a little proud (sticking out too far.) Opposing side of pipe has no gap, good.
  • No idea if the pipe is in so far that it’s hitting the other pipe, instead of resting in the inward land. Hmmm, would have to feel that as it was put together. WAIT… why is that screw so proud? Maybe the end of the pipe is hitting the upper pipe, that would twist the pipe clockwise, I can see the outside land is tight. Oh, the pipe is in too far. Or the pipe is being held by hand and that screw isn’t tight at all. Gah! …this is hopeless.
  • The upper screw seems to be not at all tight because the clamp is resting on the pipe (down toward the concrete.
  • IF the lower screw is tight, and IF the lower pipe is correctly landed, then the orientation of the angle brace is off; it needs to have it’s left end (out of the photo) moved clockwise. What? Why? …look at the alignment of the clamp at the very top edge and that side of the pipe. The whole clamp needs to rotate clockwise.

The best way to assemble these angles is to slide the clamps along their side pipes, and insert the brace pipe into both clamps at once. Then, get one end of the brace pipe on both lands (without inserting it so far that it hits the other side pipe in the tee), and tighten the screw moderately. Next, do the other end of the brace. Hopefully, you can still wiggle and shift the clamps on the side pipes, because you need to orient the brace so that both of the clamps will land correctly when you tighten the screws to lock them onto the side pipes. You will only be able to make all four lands on the side pipes touch if the corner is close to a 90° angle. Sometimes you land/clamp the ends onto the brace piece, only to discover that you can then not get the clamps to land perfectly on the side bars. But, if you get all eight lands to touch, you will have an insanely strong corner. Unfortunately, building good angle braces is something you just have to learn by doing.

Bam! You’re now a clampion. (What’s with the puns? I know, right!) But, as I sad at the very beginning, I wish someone had put all this together in one place when I started. Having read to this point, you have now just saved yourself about a year of “learning the hard way” about how to build with scaf.

ɕ
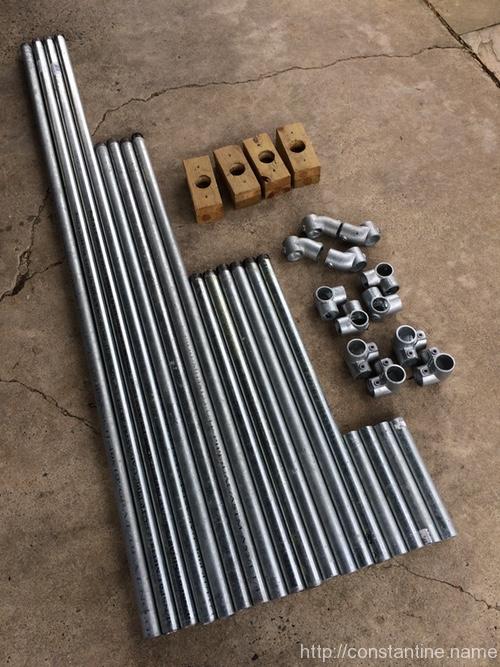
Scaf 101: The set

(Part 3 of 13 in series, Scaf 101)

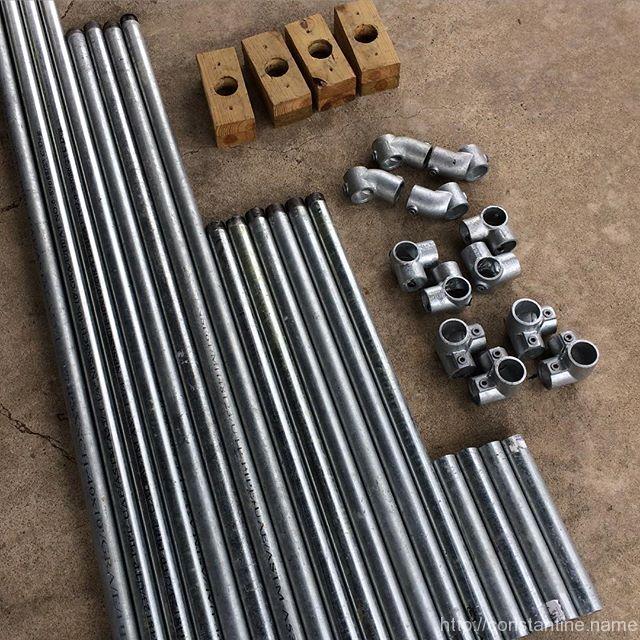
This is the set:

4 feet (8 feet if you made all the ones I suggested)
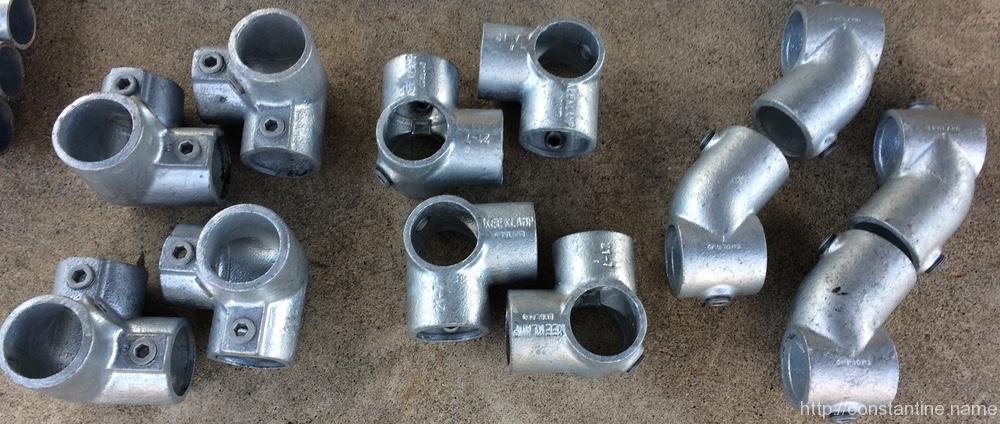
4 side out elbows (lower group of clamps in the photo)
4 double socket tees (middle group)
4 45° single socket tees (8 if you bought the extras I mentioned)
4 7-foot pipes
4 5-foot pipes
6 3-foot pipes
4 1-foot pipes

ɕ

Scaf 101: Parts list

(Part 2 of 13 in series, Scaf 101)

You need about $450 for everything in the set I’m describing in this series. You’ll need a bit more if you need all the tools, and want to make the wooden “feet” too. …or a smidge less if you have the tools already and skip the feet. (But I suggest you build the feet too. You’ll be happier down the road.)

Clamps

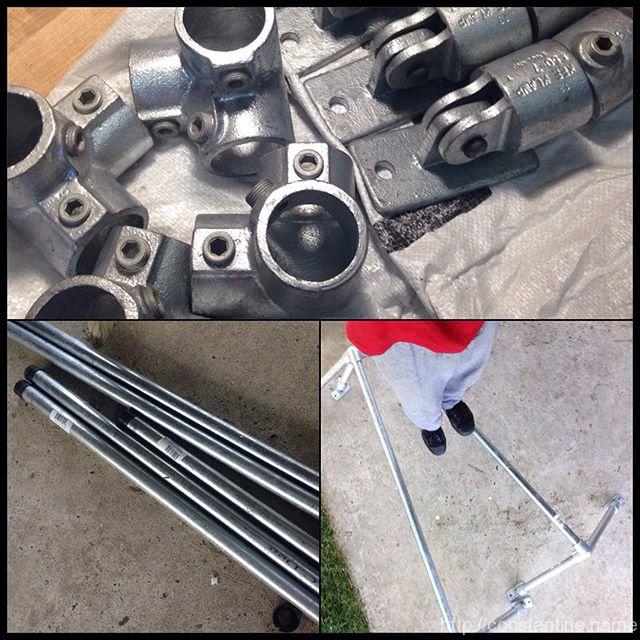
You need only 12 clamps for this set. They’re pictured below, left-to-right.

4 of Kee Safety Klamp 20-7 – “Side Outlet Elbow”, Size 7 aka 1-1/4″ Dia. $17.50 each

4 of Kee Safety Klamp 21-7 – “90 Degree Two Socket Tee”, Size 7 / 1-1/4″ Dia. $14.00 each

4 of Kee Safety Klamp 12-7 – “45 Degree Single Socket Tee”, Size 7 / 1-1/4″ Dia. $15.75 each

kee_clamps_examples

The best place I’ve ever found for clamps is Global Industrial. Here’s the link to the Kee Safety family of clamps:

http://www.globalindustrial.com/g/storage/fittings-framing-rail/Kee-Klamp-Fittings/galvanized-kee-klamp-pipe-fittings

Currently, you have to choose brand “Kee” and then choose pipe size “1-1/4” to narrow the page down to showing just the clamps you want. The 12 clamps listed above are $170 (circa Feb 2016). When they add tax and shipping, the total comes to just under $200.

Skip to the exciting part: No don’t. But I will say, if you have just a little extra money — about $65 more — buy four additional 45° single socket tees. Way down the road, in the later builds, I’ll mention, “Hey, you’ll notice you have some 1-foot pieces you’re not using in this build! If you have those extra 45°, add a brace here…”

Pipe

7 pieces of 10 foot, galvanized steel pipe, size 1-1/4″, ~$220.

(The “breakdown list” is further down explaining the lengths to cut it into.)

Pro-tip: Steel pipe is dirty, and the threaded ends have grease on them. Don’t expect to simply toss this stuff in your car. Almost all of it will fit in a trunk, but the 7′ long pieces may give you trouble.

When I first bought this pipe it was about $23, then it was $27, and most recently $29. Since this pipe is just standard schedule 40 pipe, you can call around and price shop. But remember, you need someone to cut it for you, or you have to do a LOT of hacksawing. You definitely CAN get a better per-foot cost, but you may have to buy “bundles” of pipe. As a bonus, it won’t have any threads on it. But the pipe will be longer than 10-feet lengths, and probably delivered as “freight” by a truck. Again, the whole point of this series is to get you started on the cheap. So just buying 7 pipes from Depot is the way to go. (But don’t take my word for it, call around.)

Home Depot will cut the pipe for you. The pipe is sold with threaded ends. (They receive it that way. They don’t sell it without the threaded ends.) They charge $1 to cut the pipe AND put threads on the ends. Depending on the employee, they may cut the pipe for free (since threading the ends is the tedious part). But, if they charge you $11 for the eleven cuts (see below), be happy. $11 is WAY better than hacksawing steel pipe.

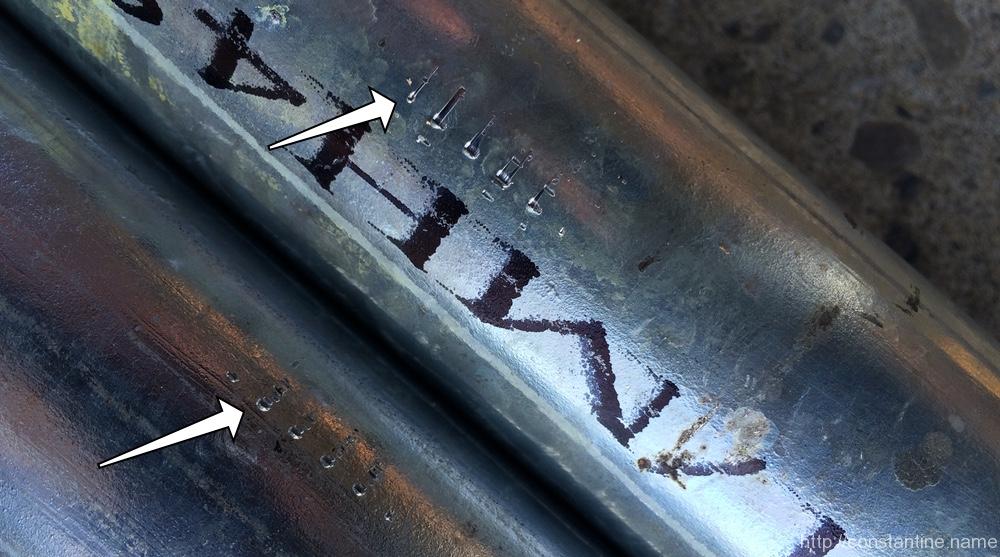
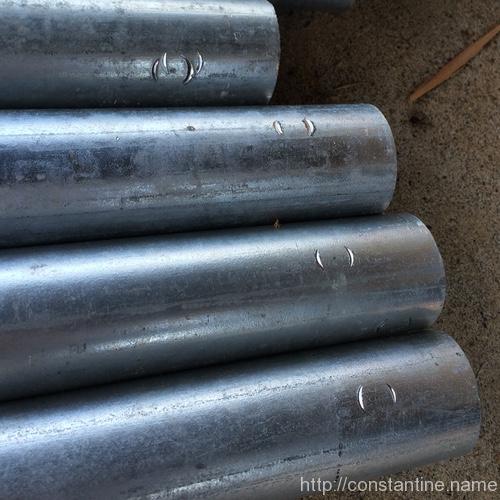
One last note about cutting the pipe. If you have Depot do it, they use a machine that grabs the pipe and spins it (it makes sense when you see it done.) The machine leaves a few little marks in the pipe. You can feel them, but they’re harmless.

clamping_marks

Tools

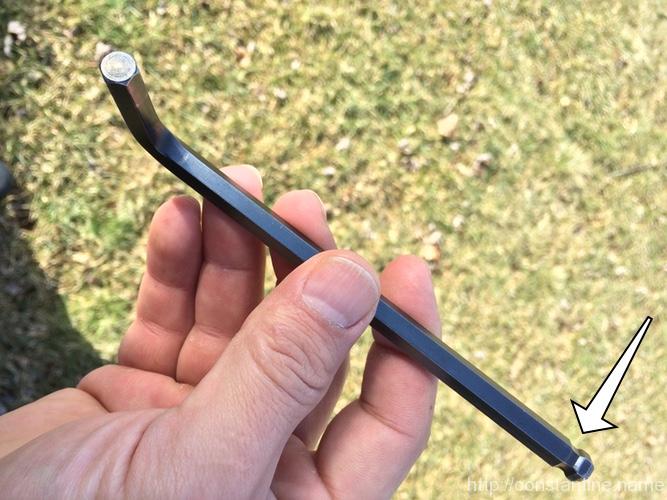
You need an 8mm Allen wrench. You’ll be happier if you have more than one because your new scaf set means you’re going to have new friends who you can put to work. Does this really need explaining? …fine, here’s a photo of a hand model holding a wrench:

allen_wrench

See that neck on the end of the wrench? That allows you to insert the wrench on a slight angle and spin it quickly with your fingers. Really handy to keep the upper L-bend from swinging into pipe/clamps — you’ll discover that happens ALL THE TIME, and is why people use rachet wrenches after a while of this. Seriously Craig? You took a photo of the angled Allen wrench? Yeup:

angled_allen_wrench

You can use a regular wrench as pictured, which has the advantage of keeping you from over-tightening the screws. The downside of this little wrench is you have to work pretty hard and it’s tedious to use.

Euphamism alert! The screws cut little pairs of curves into the pipes, making the scaf pipe look less sexy. The light marks (shown below) from reasonably tight screws I like to call “set screw kisses”, and the really deep gouges — that can sometimes cut your hand (none shown below) — from really tightened screws, I like to call “set screw hickies”. Yes, I’m a simple creature, easily amused.

set_screw_marks

Alternatively, you can buy the Allen driver to fit into a standard ratchet wrench if you already have one of those sets. The 8mm socket attachment should come as a 3/8″ drive socket – meaning it fits the “medium” sized driver. (Some people also buy the 3/8″-to-1/2″ drive socket adapter so they can put the 3/8″ drive socket onto the large, 1/2″ drive handle.)

IMG_1528

One last word about those set screw “kiss” marks: On the ends of the pipes, it’s not that big of a deal. The pipes will almost always be hidden inside clamps. But some of the clamps you will be positioning in the middle of the pipes. If you tighten the screws really hard, you make deep marks in parts of the pipe that you WILL be later stepping or grabbing. Experienced scaffers (did I just invent a word?) are more gentle on mid-pipe clamps, returning to snug them later, rather than tightening the daylights out of them immediately.

Break down

You need to make the following cuts. The employee at Depot is unlikely to appreciate the four, one-foot cuts. I recommend smiling, being polite and asking nicely. :)

Cut 2 pipes in half (i.e. at 5 feet.)
Cut 4 pipes at 7 feet.
Cut 1 pipe into 4 one-foot pieces, and 2 three-foot pieces.

You’ll end up with 18 pieces of pipe:
4 x 7′
4 x 5′
6 x 3′
4 x 1′

R&D digression: A bit about how I came up with this set: I have PILES of scaf and clamps. What I did was come up with small sets of parts and then figure out what I could build. I kept adding/removing/changing the pipe/clamp combinations to see what could be built. I also kept in mind that starters have to buy 10′ pipes; doesn’t make sense to go, “oh, we need just one more 4-foot piece” when they then have a 6-foot “extra”. So it’s a balance of cost, what you can cut from 10-foot pieces and how many clamps are needed. Way WAY at the end of this series I’ll mention a few places where having a few more 45-single outlets would let them add some bracing in the setups where they are not using the little 1-foot pieces. You can toss a little 1-foot angle brace in almost anywhere and it makes for bomber builds. I digress.

Extra credit: Feet

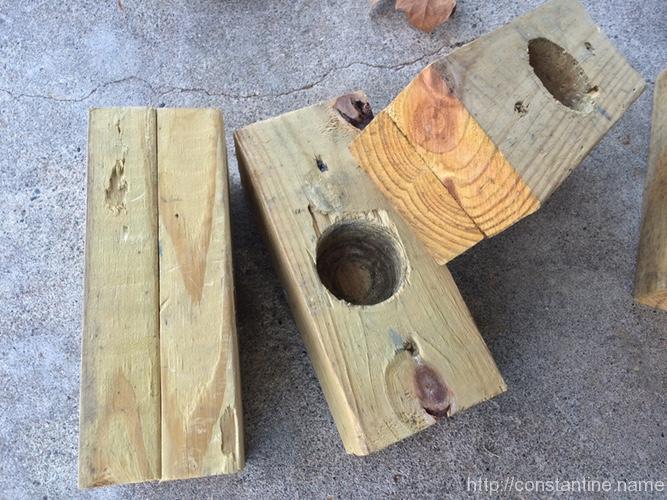
I bought a pressure treated 2×4 and made feet for the scaf. If you’re setting it up on concrete, the pipe WILL dig up the concrete when you have it set up certain ways. (The “A” frames for laché, the “railing” setup where the pipe ends rest on the ground, etc.) If you have these feet, you can just set the pipe ends in the feet.

scaf_feet

Mark out 8, 10-inch cuts on the 2×4. Use a 1-3/4″ (or whatever) hole saw to drill through 4 of the pieces. Then cut the 2×4 into pieces and screw them together. Viola!

Pro-tip: If you’re making feet, make more than 4 because the 2×4 is plenty long. You’ll use the feet down the road when you have more scaf. A lot of scaf designs I see have clamps and pipes right down on the ground to avoid the naked pipe ends resting on the floor/ground. Well, if you have feet for those pipe ends, you have a whole range of options where you move the pipes up from ground level (changing clamps of course) to give you more intermediate bar options. It will all makes sense once you are fully addicted to Pipe Culture. Anyway, if you want to go full out, make 8 feet (mark 16 10-inch pieces, drill through 8 of them) and you’ll use them on my last example setup.

ɕ

Scaf 101: Introduction

(Part 1 of 13 in series, Scaf 101)

This series of posts (12 total, navigation is at the very bottom of each post) is intended to give you enough basic information to get started with scaf. I’m going to give you a specific list of things to buy — what I’m calling “The Set” — while trying to keep the cost as low as possible. I’m also going to show you a number of completely different things you can construct using the set.

In the initial posts, I’ll assume you know nothing and I’ll explain everything. As I show various setups, I’ll initially explain every step of assembly so you understand how to put things together without killing yourself (by working too hard, or by dropping pipe on your, or your friend’s, head). I do not recommend skipping to the end because the instructions on the later setups assume you understand what’s going on, and they only mention the “this is unusual or interesting” parts.

Once you spend some time building, and playing on, scaf, you’ll understand what is easy to build, what is hard to build, what is pretty stable and what is not. But how do you get started? The hard part is figuring out what should be the very first pile of stuff you buy. You want enough to have fun and options, but not more than you need, because scaf gets very expensive very quickly. VERY roughly, it’s almost $20 for every clamp, and almost $3 per foot of pipe.

This entire set is about $400 and will build you some really neat setups. There is a detailed parts list and buying instructions/links in the next post in this series.

Safety

Hey! Let’s get this out of the way now…

This sh*t is DANGEROUS. Seriously. You have been warned. I’m not being hyperbolic here.

The easy-to-get pipe used in this set comes with threads cut into the ends. The threads are razor-sharp. (The clamps cover the ends of the pipe.) I know what I’m doing, and still I’ve cut myself many times.

Steel pipe is heavy. If you lose control of even a seven-foot piece as you stand it on end, it will KILL someone if it falls on someone’s head. But what about pinched fingers and dropped-it-on toes? …I’ve had too many to count. Plus the old (not funny at all) slap-stick humor of carrying pipe, turning and striking someone with the end behind you. Steel pipe is heavy. There’s no “oops, sorry bro’,” just lacerations, crushed fingers, concussions and broken bones.

…and there’s the danger of the clamps working loose. You are planning to jump on, step on, swing from and generally use this NOT in the way the manufacturers intended. You have to learn how to align the pipe in the clamps, (or everything will wiggle loose even more quickly). You have to learn how tight to make the clamps, (so as not to break things, but tight enough to hold). You have to be smart enough to check and tighten things occassionally.

…and THEN there’s the danger of falling OFF the scaf. Or having it topple over ONTO you, or with you ON it. …or IN it.

Terminology

Back on day one of my Life With Scaf, this was very confusing and I wished someone had written a getting-started guide. So, here it is:

Kee Safety Klamps – This is a brand name of a type of pipe clamps. There is a whole collection of clamp types with neat names like “side outlet elbow”, “90 degree two socket tee”, etc. The set I describe in this series contains just three types of clamps that will get you started. As you buy more — and you will buy more because scaf is a highly addictive habit — you’ll have no problem figuring out what the other clamps are for.

kee_clamps_examples

Set screw – Each clamp has several screws (one screw for each pipe the clamp accepts) that are threaded into recesses in the body of the clamp. You will need an 8mm Allen wrench to tighten them. Clamps come with their set screws but there’s no wrench. This isn’t IKEA. (More on wrenches later.)

kee_clamp_set_screws

Schedule 40 – You don’t really need to know this, but it’s common to encounter the terms “schedule 40”, and “schedule 80”, when talking about scaf pipe. A “schedule” is a giant table of specific details like exact dimensions, and strengths for each of the various sizes of pipe. It’s used when building engineered structures where they’re computing loading for realsies with math. What we need to know for this series is that you want “schedule 40” pipe. (If anyone should ask you, that is.) Schedule 80 is much heavier, and therefore stronger, but is the same EXTERIOR size. So it fits all the same clamps as schedule 40 pipe. Down the road, you might want to shell out for a special schedule 80 pipe or two if you’re doing a lot of gonzo bar precisions or something. Anyway. You’ll have a good understanding of schedule 40 pipe after you play with this set. The longest pieces in this set are 7-feet, and they’re going to feel pretty nearly “bomb proof”.

steel_pipe_schedule_40

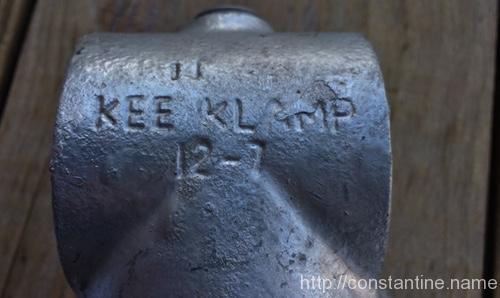
1-1/4″ pipe – The least obvious thing about scaf is what size do you use? It turns out that this size is the best balance of weight, cost and strength. So the most commonly used size is “Size 7″. (For clarity: That is the seventh pipe size in schedule 40, also the seventh row in the table, and is known as 1-1/4″ or one and one-quarter inch.) Home Depot or other Big Box stores will just label it as 1-1/4”. Here’s the confusing part: There is NO dimension on 1-1/4″ pipe which is 1-1/4″. The interior diameter is close to 1-1/4″. Anyway. Just learn: “Size 7, otherwise known as 1-1/4″ pipe.” Kee Safety clamps have their size molded into their body; They have two numbers, like “20-7”, meaning clamp style 20, size 7. Again, after you play with this set, if you ever encounter a clamp that’s not size 7, it sticks out like a sore thumb. (I once received a pile of clamps in a box, and there was one number 8 incorrectly included… it was instantly obvious.)

kee_clamp_markings

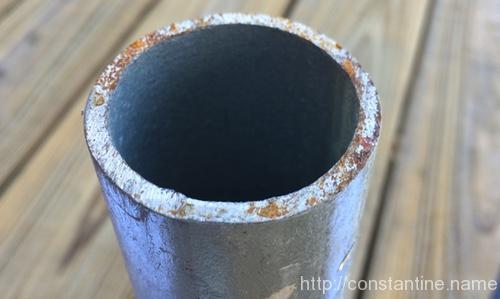
Galvanized steel – You want “galvanized steel pipe.” You will also find “black pipe” at your local Big Box store. Do not use “black pipe”. For one thing, it feels different to the bare hands, and I like it less. For another thing, it will rust if you have it outside. “Galvanized” means the steel is coated with some Zinc. The Zinc will corrode away before the steel rusts, and black pipe is NOT galvanized. For yet another thing, I have NO IDEA about the strength of “black pipe”. When you cut pipe, you expose steel which is not galvanized, and lo and behold! …it rusts. The pipe in the photo never got wet, that’s just good old humidity and oxygen doing their thing. (“Rust never sleeps!”)

galvanized_pipe_cut

Summing up

We’re building this scaf set with size 7 Kee clamps, an 8mm Allen wrench, and schedule 40 galvanized steel pipe.

ɕ

Reset

Had to completely break it down to get it back to my patio. I was going to just reassemble what I had before, but now I’m wondering what new shenanigans I can set up… I recall some cool railing-esque stuff I wanted to work on.

ɕ

Videos from BKB

(Part 18 of 72 in series, My Journey)

Some videos I took in April 2015 when I was last up in Somerville. This certainly isn’t a great answer to “what is parkour” in the global sense. But it will give you an idea of what I was working on when I had several hours to play on some scaffolding when I had unstructured time to just train.


ɕ