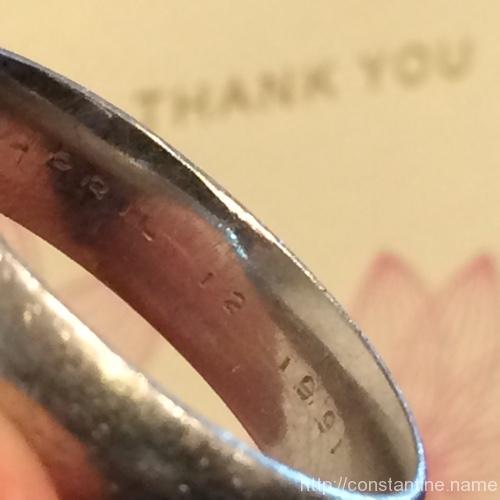
I always tell young people to find a path in life that you can embrace and enjoy rather than something that you’re expected to do. That’s what makes life interesting. And once you achieve a certain level of success, no matter where you are, what you’re doing, don’t be content with that level. Push yourself to another level. People that are successful are always pushing.
The best way to get a vivid impression and feeling of a landscape, is to sit down before it and read, or become otherwise absorbed in thought; for then, when your eyes happen to be attracted to the landscape, you seem to catch Nature unawares, and see her before she has time to change her aspect. The effect lasts but for a single instant, and passes away almost as soon as you are conscious of it; but it is real, for that moment. It is as if you could overhear and understand what the trees are whispering to one another; as if you caught a glimpse of a face unveiled, which veils itself from every willful glance. The mystery is revealed, and after a breath or two, becomes just as great a mystery as before.
There’s a practice to reaching that effect. At first, I couldn’t pull it off. After much practice, I can now arrive at this state quite regularly. Alas, at no time have I ever imagined as delightful a description as Hawthorne’s. The interesting part of the effect—at least, the effect I’m experiencing—is that it is quite clearly me that is different. Our brains are powerful filters; salient is how we describe that which our brains admit. In experiencing this effect, it feels like the salience filter is transparent… as if, instead of feeling swamped by sensory input, the window to the world is momentarily perfectly clear.
When you start to see your world as something more in line as a tool and an obstacle to interact with, play with, you’re going to take that lesson and look at other obstacles in your life. Your relationships, your job, your work, your health even. All these things are going to be so strongly ultimately affected by this tiny little change of yourself and your city.
By definition LC is about dietary carbohydrate restriction. If you are reducing carbohydrates, your proportional intake of protein or fat, or both, will go up. While I don’t think there is anything wrong with a high fat diet, it seems to me that the true advantage of LC may be in how protein is allocated, which appears to contribute to a better body composition.
Zoinks! This short article is dense. I read each paragraph. Then slowly reread the paragraph, squinting slightly and turning each sentence over in my mind. It feels like there’s at least one actionable-item, (something to start doing, or something to stop doing,) in every paragraph. I’ve spent a lot of time in recent years trying to learn what I can about all the things in this article. It’s a beautiful assembly that backs up the thesis in the first paragraph, (which is quoted entirely above.)
Recently my “little” box of quotes outgrew its original little box. The collection now exceeds 600 cards and continues to grow at an accelerating pace.
…and it has expanded conceptually far beyond simply being a box on my desk. The Little Box of Quotes podcast has surpassed a year of daily episodes. A precious 10 or so of the quotes were the original seeds for what became my personal sequence of daily reminders for reflection. My personal sequence then inspired my series on Practicing Reflection which ran during the opening days of 2021.
I’m curious to see where I’ll be with this in another 5 years.
“The pleasure in thinking and doing things well is…deep-wired.” I think this is absolutely true. Thoreau retreated to Walden Pond, in part, to do nothing — to just observe and live deliberately — but he also wrote a first draft of a book, A Week on the Concord and Merrimack Rivers, while in his cabin. He then left the pond to move in with Emerson, where he wrote another book, this one about his experience at the pond, then another soon after, Civil Disobedience. Thoreau found peace observing nature; but his real pleasure was in producing enduring work.
I’ve long ago lost any real sense of which life changes have had the most benefit. But if I were to pick one, it would be making time to reflect. I’m often making adjustments here and there to my life, and those changes are always based on a period of reflection. What have I been doing that has been making me feel well? What have I been doing that has been making me feel unwell? …and so on.
For a while—three years to be specific—I’ve been trying to begin each day with some basic movement/stretching and then some sort of physical activity. I’m talking about first thing each morning. Get out of bed, deal with necessities (eg, coffee :) and then begin with movement and activity. 3 and 2 years ago, that activity was running. For the past year, the physical activity has been a sort-of-like-Olympic-weight-lifting program called Happy Body.
This is not working for me. Sure, when I manage to start with activity then I’m awake and moving and it’s good for my health and I get lots of what I want done each day. But it’s a struggle every. damn. day. blech! What I really want, first thing in the morning, is to NOT be physically active, but rather to be mentally active.
Starting today, I’m overhauling my first-thing-each-day routine to be:
I encourage you to build a reflection habit. It can be first-thing each morning or whenever works for you. (Many people allocate time for reflection as the last thing each day before going to sleep.) You should intentionally choose what to do as your reflection practice. I’ll go so far as to suggest you perform a few weeks experimentation with each idea you come up with, until you find a reflection practice that works for you. The more you reflect the more you’ll want to iterate and improve creating a virtuous feedback loop.
That’s the plan anyway. It’s certainly the best plan I’ve come up with for me, so far.
The traditional approach—which is clearly not working—is to “manage” this chronic condition with medications and the ever-ubiquitous “eat-less-avoid-fat-exercise-more” lifestyle interventions. At best, this approach only slows down the progression of the disease.
Often the things I’m commenting on are “close to the ground” — things that are immediately actionable, or suggestions of things to go explore or do directly.
This one is different. Peter Attia sits in a certain niche — if you know of him, you are nodding knowingly — but this particular article is a neat attempt to zoom way out to think about wether the more “on the ground” sort of “do this”, “do that” personal direction is inherently scalable out to population-wide solutions to problems.
So excited to be half way through the numbers of my year-long project. I have about 110 days remaining to do the second 5,000 reps of all the activities. But at this point, it is now possible to do 120 reps (pull-ups being the limiting activity) in a single workout. Granted, that workout takes about two hours but it means it is finally possible to warm up, get started, and get it done.
Last week was a lot of random-seeming numbers of pull-ups just shoved into every day. That took a real toll on my arms. So I was particularly careful about getting back on the pull-up bar.
But first…
5,000 bar precisions…
This seems inconceivable to me. I remember starting all of this…. and now? Well, here’s the worksheet from the last workout on bar precisions:
I did 260 bar precisions (I still have the bars set at 64″ like in the video I recently posted). This seems like an insane number when you step up on the bar. But I start counting to 26, then make a mark in my little book… and then do that 9 more times. It is VERY difficult to stay focused for the entire time. I mean, REALLY REALLY difficult. I don’t see how I can fully convey the experience here (in a quick update), so I’ll leave it at that. I’d love to talk about it some time… so chat me up. :)
Meanwhile, I had planned to do the magical 5,000 milepost workout of the other activities on the following day (Thursday, in the screen grab above.) I headed to the bar, did a bunch of range-of-motion movements, some joint rotations, etc. Then tried a pull-up and OW! …not happening. Normally, the FIRST pull-up always sucks, but on Thursday I felt discretion was warranted. I mustered a LOT of courage and pushed the workout back until my arms felt better. (ie, so it didn’t feel as if they were going to be ripped off my torso at the same time my forearms exploded.)
5,000 pullups!
…also, 5,000 pushups! 5,000 seconds in handstand! 5,000 body-weight squats!
Saturday morning, it was conveniently raining (delaying our plans to tackle yard-work) and I decided to get at it. I warmed up and spent just over 2 hours trying to stick to a ten-minute circuit combining pull-ups, squats, handstand, sitting in a resting squat position (another of my projects is to get a full resting squat). Note the screwball “42” pushups in this workout; That’s just a result of a recent push-up challenge I was doing with some friends where I banked a pile of pushups, so in this workout I can just coast to 5,000.
There it is. April 2nd… 5,000 across the board.
Next week…
I’m going to tweak the circuit just a bit so I can get 125 reps into a workout. At that rate, I have this miraculous spreadsheet projection, where one thousand reps happens in just 8 workouts. boo-YEAH!
…assuming of course I can manage to follow through on this ambitious pace:
This distinction holds for adult reading too. The dangerous fantasy is always superficially realistic. The real victim of wishful reverie does not batten on the Odyssey, The Tempest, or The Worm Ouroboros: he (or she) prefers stories about millionaires, irresistible beauties, posh hotels, palm beaches and bedroom scenes—things that really might happen, that ought to happen, that would have happened if the reader had had a fair chance. For, as I say, there are two kinds of longing. The one is an askesis, a spiritual exercise, and the other is a disease.
I do NOT recommend using these plans to build a vault box. I’m putting this up for a historical record of what we did (so I don’t have to remember.) I’m already writing another article explaining a better way to build a vault box.
Really. Don’t build vault boxes using these plans.
We, (Lehigh Valley Parkour) built 8 of these vault boxes. They are rock-solid, portable, stackable, etc. They’re great! …but you can do better. So I’m creating another set of plans from a slightly modified second design.
What we did that went right
The “small” top-box from eight vault boxes.
One completed box. Notice it’s not perfect. Not shown: the ratchet strap you have to put on it before trying to use it.
Here’s one box nest-stacked in a Jeep.
You can get the materials for less than $100 per finished box. We collected $100 from everyone, up front and bought everything together in one go.
We built 8 of these. We started by building one box from start to finish. It was the worst box, but we learned a lot. Most importantly, you need one person who understands how the whole box should go together so you can make sure it goes correctly.
We had so much material, we rented a cargo van, (it was winter and we didn’t want to deal with unexpected bad weather messing up our scheduled “buy everything” date) to haul the 1,000+ pounds of lumber and plywood to where we were going to build. We had four people on the “buying night”, and then several 6-hour DAYS of 4, 6 and even 8 (on one day) people working on building these.
We had all the right tools. This is a lot of cutting and screw driving… circular saws are dangerous, second only to chain saws. We had people with safety glasses, ear plugs, work gloves. One guy working the circular saw with two helpers moving plywood. Other people with a battery drill to drill pilot holes, another person with a corded drill driving deck screws. People with orbital sanders and files, someone drilling the large holes and cutting the hand-hold slots. It was crazy.
What goes wrong
The root of the problem is that the design is sloped in both directions; There is a 15° lean from vertical on the “fronts”, (the bigger faces you’ll approach most often) and 7.5° on the “sides”, (the more narrow faces where the hand-holes for lifting are located.) This is simply too difficult to get it to work out correctly with rough lumber and basic building skills.
This box isn’t screwed together, it’s just leaning. But you can see how all the parts have to be perfect for this to work out.
The left face of that 2×4 should be angled about 2°. Then the 2×4 would correctly sit in the corner.
…instead, the deck screws pull the plywood in that 2°. :*(
The biggest problem is that the corners are compound miters. In each corner there is a piece of 2×4. When you put a 90° angle (the corner of a 2×4) into the compound miter at the 15°/7.5° corner, you find out that you really need about a 93° corner on the 2×4. It almost works. The 2×4 goes in, but when you screw the faces together, it “pulls” the big face inward, making the plywood bow concave. That messes up the bottom of the box’s fit onto the next box below. I ended up adding some additional 2×4 strips near the bottom of the box front to straighten the faces… but it’s fiddly to get it to come out right.
These extra braces are NOT mentioned anywhere in the plans.
When I was coming up with this design, I tried combinations of different angles and eventually settled on 15°/7.5° because:
These angles make the finished boxes nest when you stack them in reverse order.
When you stack them up, you won’t knock the pile over using the box.
15° and 7.5° are reasonable bevels to cut on plywood edges with a circular saw.
You can measure convenient lengths of “2 inches” and “4 inches” and cut diagonally across the plywood strips for the box faces to get almost exactly the angles you need.
I also spent a lot of time adjusting dimensions to make the box as large as possible from only two sheets of plywood. There is very little scrap material left over.
When building, getting the box to work out right is difficult; If anything is off by even ONE-QUARTER of an inch, then the box isn’t perfect. If anything is off by HALF an inch, you may not be able to get the box together at all. Every cut on the plywood has to be perfectly straight, which means you have to use a clamped straight edge to guide the saw on every cut and you must always get the bevel correctly arranged. So sometimes you have to cut “backwards”, (the opposite way from the normal, safe way you’d cut with a circular saw.)
Measure (here, from the edge off the bottom of the photo) then nick the plywood, and do not move the saw.
Set the straight edge against the saw’s shoe and clamp. Measure from the edge to the guide…
…set the other end of the guide. (pencil mark just shows you where the saw will really cut.)
Cut along the guide. This is an example of cutting “backwards”. (Because the bevel has to be in this orientation.)
Also, near the end of the plans it describes a little about how to put the top-piece of plywood on each box. It works fine for the top/smallest box. But for the middle and bottom, the way to do it is: measure the opening of the box above, then cut the plywood sheet and screw it to the box. It might not look perfect, but if you put the plywood on so it fits nice, the box above isn’t likely to fit correctly over it.
Finally, the plans, (in the notes near the back of the PDF) show how to figure out how much paint you need to paint them. We used a grey outdoor deck/porch paint, and we mixed in fine sand to give the box some traction. If you’re making artificial obstacles, may as well make them friendly too.
Specific notes
The PDF document above has notes added in red pencil:
Pages 1 and 2:
We added hand-holes for lifting. They’re not shown on these sketches.
“Bevel” means set the bevel angle on the circular saw, i.e., make the saw blade lean. Saws only bevel in one direction, so every cut in the plans has an arrow on end showing you which way to cut; This determines the orientation of the “under bite” made by the saw.
{ The saw we used is “right handed”, (as are most saws) the blade tips to the right, and the blade bites under to the left. Some of the cuts are difficult because the “easy” cut direction, (with the saw on the bigger part of the piece, dropping the cutoff away to the right) would produce the wrong bevel on the work. }
For cuts number ‘2’, ‘3’ (which you do twice) and ‘4’: The arrows point the wrong way; They should point to the right on the diagram so you have 3 cuts that are easy/the-right-way, and just the last one is “in the wrong direction”, against normal saw usage.
This column shows you the materials you’re using up as you go along. It just helps you keep track of everything.
Page 2:
Don’t bother stacking. Just measure, mark and cut each (‘A’, ‘B’ and then ‘C’) strip as shown.
Yes, all the strips’ edges have a 7.5° bevel on them. Yes, it really does not matter which way you have the bevel when you cut the end-angles.
Page 3:
Cut ALL of these cuts the other way. It’s easier. Cut ‘1’ just trims the sheet to put the bevel on, cut ‘2’ (5 times) drops strips off neatly. Then you turn the piece around and cut it the “wrong way”; “wrong” in terms of how you normally rest the saw and cut “off” the smaller part.
Nothing to see here.
Page 4:
This is the view of the end of the 2×4. Just run the saw along the right edge of the 2×4 steering generally straight.
Page 5:
At least 3/4″, more is fine.
Pages 10 etc:
These are just some notes from figuring out how many boxes of screws we needed. (We didn’t put the exact number of screws in. We just went with “that’s probably enough”. And we ended up using only half the deck screws.) Also some calculations of how much paint we needed to buy.
Copyright
"Vault box design 1, sloped sides"
Copyright (C) 2014 Craig J Constantine
This information is free; you can redistribute it and/or
modify it under the terms of the GNU General Public License
as published by the Free Software Foundation; either version
2 of the License, or (at your option) any later version.
This work is distributed in the hope that it will be useful,
but WITHOUT ANY WARRANTY; without even the implied warranty
of MERCHANTABILITY or FITNESS FOR A PARTICULAR PURPOSE. See
the GNU General Public License for more details.
You should have received a copy of the GNU General Public
License along with this work; if not, write to the Free
Software Foundation, Inc., 51 Franklin Street, Fifth Floor,
Boston, MA 02110-1301, USA.