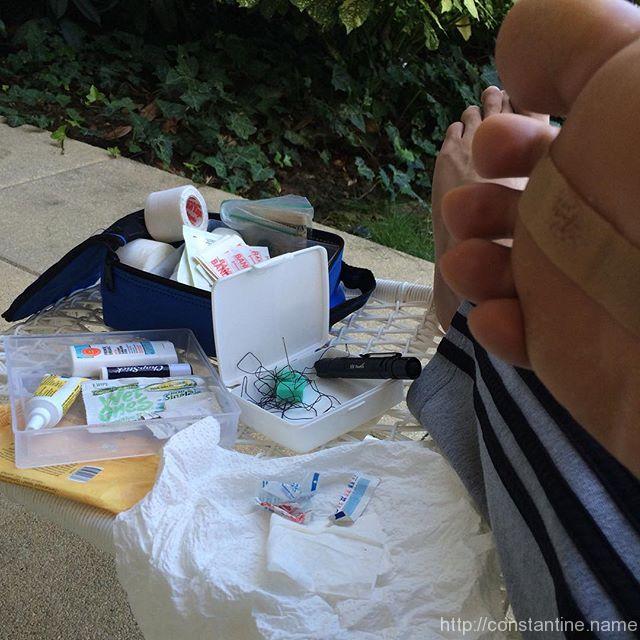
It’s only a splinter! I usually only show the rosy side of travelling and jumping on stuff. Well, seems I picked up a wee sliver of England at RDV XI. (ask me about the barefoot bail into thorns) Yes my tetanus immunization is up to date. THIS is why you should always travel with your personalized med kit… #DIY Tracy trained all day while I did my “wimpy lion with a thorn in its paw” imitation. Hopefully good to go tomorrow #famousLastWords (PSA: early symptoms of Tetanus include jaw spasms, drooling, excessive sweating and irritability? …oh i’ve had that for 45 years then :P
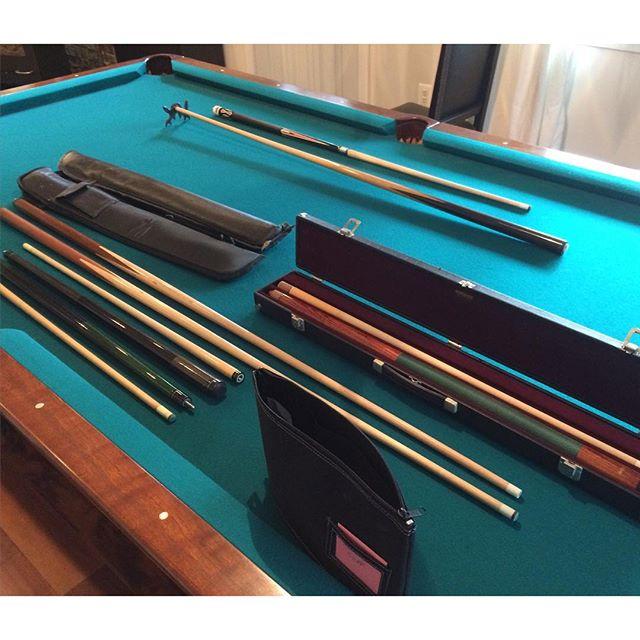
Taking time to repair cue tips. The Schnelk in the case I’ve had for about 30 years now. Bought it back when this table was in my grandparents’ basement on Westminster street in Allentown. Would never have believed then, what this table looks like now, or where it would be today!
Drop me an email: Comments, questions, and suggestions for improvements are welcome. Best of all would be if you sent me some photos of what you built, preferably a big group photo of you on them, or using them or whatever. My email is my first name, craig, at this domain. (Yes, this is a “.name” domain.)
I do NOT recommend using these plans to build a vault box. I’m putting this up for a historical record of what we did (so I don’t have to remember.) I’m already writing another article explaining a better way to build a vault box.
Really. Don’t build vault boxes using these plans.
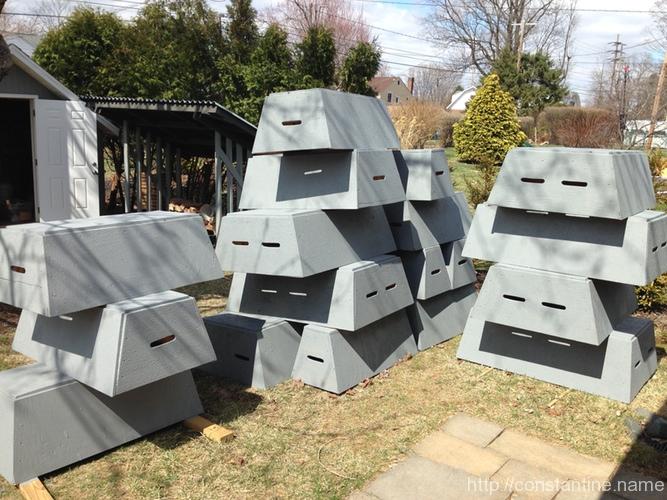
We, (Lehigh Valley Parkour) built 8 of these vault boxes. They are rock-solid, portable, stackable, etc. They’re great! …but you can do better. So I’m creating another set of plans from a slightly modified second design.
What we did that went right
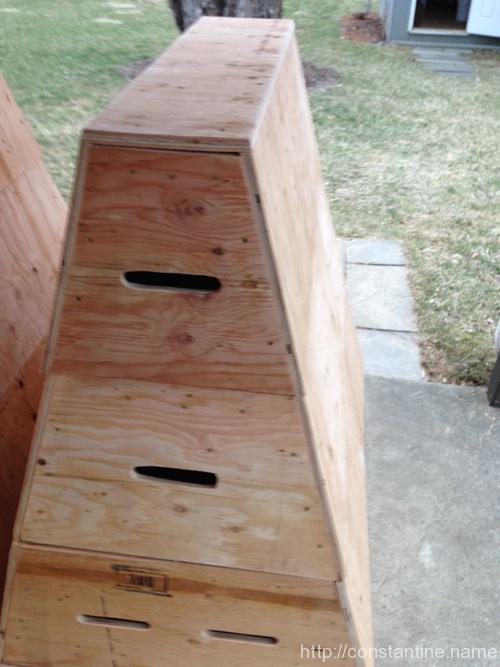
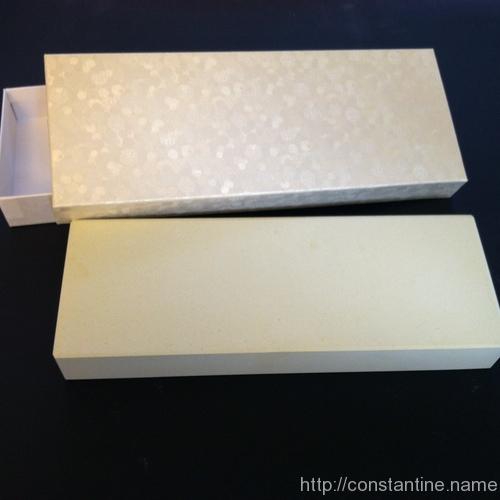
The “small” top-box from eight vault boxes.
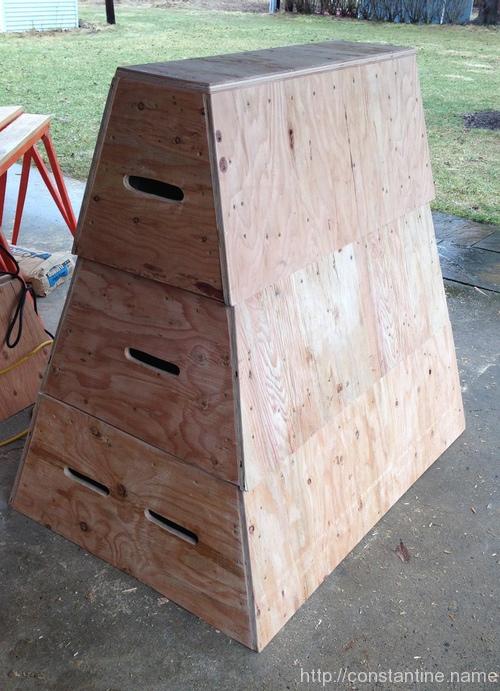
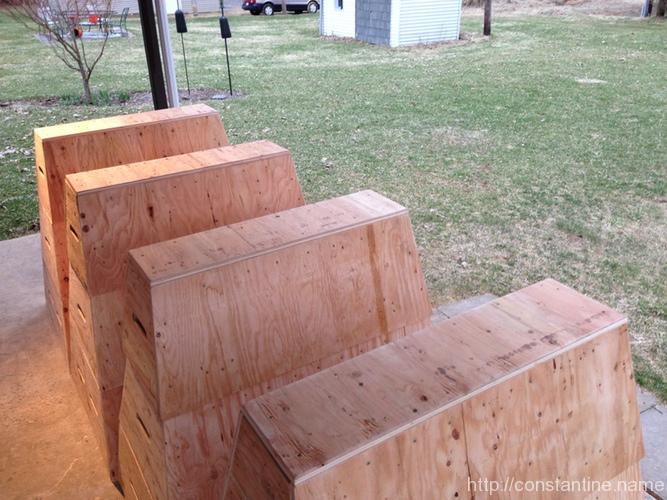
One completed box. Notice it’s not perfect. Not shown: the ratchet strap you have to put on it before trying to use it.
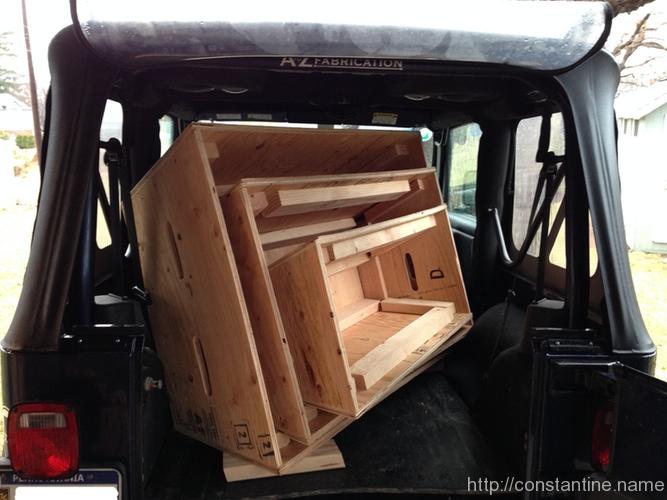
Here’s one box nest-stacked in a Jeep.
You can get the materials for less than $100 per finished box. We collected $100 from everyone, up front and bought everything together in one go.
We built 8 of these. We started by building one box from start to finish. It was the worst box, but we learned a lot. Most importantly, you need one person who understands how the whole box should go together so you can make sure it goes correctly.
We had so much material, we rented a cargo van, (it was winter and we didn’t want to deal with unexpected bad weather messing up our scheduled “buy everything” date) to haul the 1,000+ pounds of lumber and plywood to where we were going to build. We had four people on the “buying night”, and then several 6-hour DAYS of 4, 6 and even 8 (on one day) people working on building these.
We had all the right tools. This is a lot of cutting and screw driving… circular saws are dangerous, second only to chain saws. We had people with safety glasses, ear plugs, work gloves. One guy working the circular saw with two helpers moving plywood. Other people with a battery drill to drill pilot holes, another person with a corded drill driving deck screws. People with orbital sanders and files, someone drilling the large holes and cutting the hand-hold slots. It was crazy.
What goes wrong
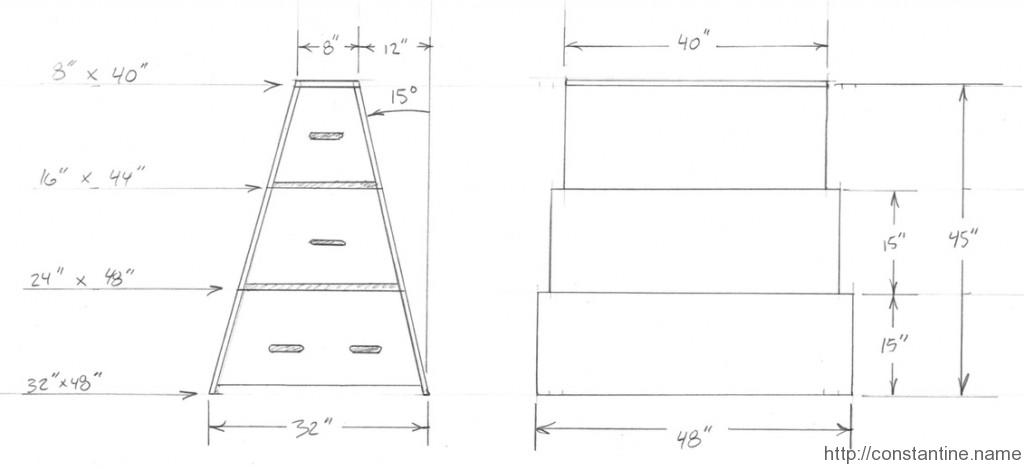
The root of the problem is that the design is sloped in both directions; There is a 15° lean from vertical on the “fronts”, (the bigger faces you’ll approach most often) and 7.5° on the “sides”, (the more narrow faces where the hand-holes for lifting are located.) This is simply too difficult to get it to work out correctly with rough lumber and basic building skills.
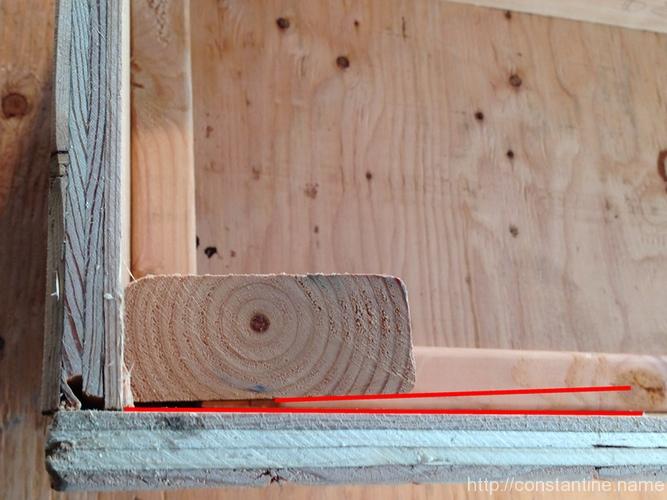
This box isn’t screwed together, it’s just leaning. But you can see how all the parts have to be perfect for this to work out.
The left face of that 2×4 should be angled about 2°. Then the 2×4 would correctly sit in the corner.
…instead, the deck screws pull the plywood in that 2°. :*(
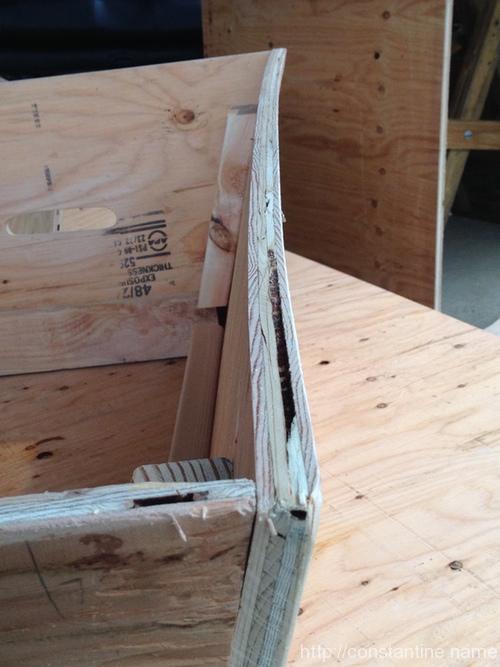
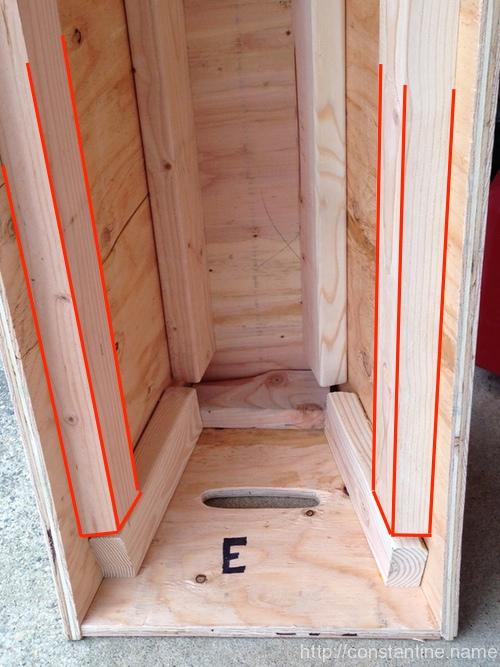
The biggest problem is that the corners are compound miters. In each corner there is a piece of 2×4. When you put a 90° angle (the corner of a 2×4) into the compound miter at the 15°/7.5° corner, you find out that you really need about a 93° corner on the 2×4. It almost works. The 2×4 goes in, but when you screw the faces together, it “pulls” the big face inward, making the plywood bow concave. That messes up the bottom of the box’s fit onto the next box below. I ended up adding some additional 2×4 strips near the bottom of the box front to straighten the faces… but it’s fiddly to get it to come out right.
These extra braces are NOT mentioned anywhere in the plans.
When I was coming up with this design, I tried combinations of different angles and eventually settled on 15°/7.5° because:
These angles make the finished boxes nest when you stack them in reverse order.
When you stack them up, you won’t knock the pile over using the box.
15° and 7.5° are reasonable bevels to cut on plywood edges with a circular saw.
You can measure convenient lengths of “2 inches” and “4 inches” and cut diagonally across the plywood strips for the box faces to get almost exactly the angles you need.
I also spent a lot of time adjusting dimensions to make the box as large as possible from only two sheets of plywood. There is very little scrap material left over.
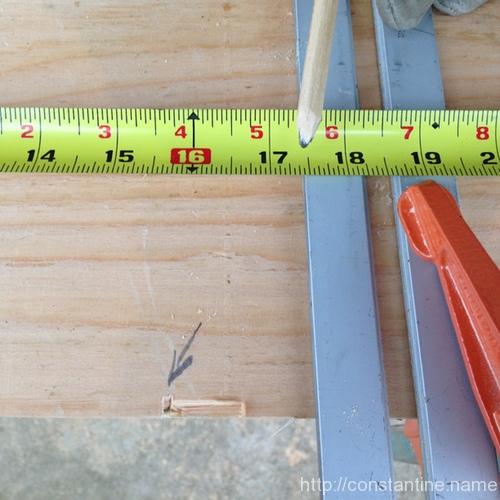
When building, getting the box to work out right is difficult; If anything is off by even ONE-QUARTER of an inch, then the box isn’t perfect. If anything is off by HALF an inch, you may not be able to get the box together at all. Every cut on the plywood has to be perfectly straight, which means you have to use a clamped straight edge to guide the saw on every cut and you must always get the bevel correctly arranged. So sometimes you have to cut “backwards”, (the opposite way from the normal, safe way you’d cut with a circular saw.)
Measure (here, from the edge off the bottom of the photo) then nick the plywood, and do not move the saw.
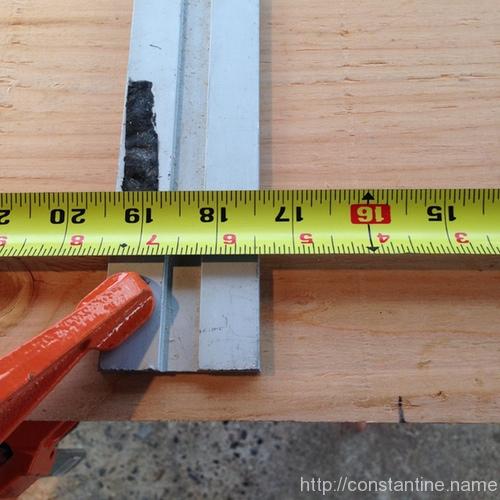
Set the straight edge against the saw’s shoe and clamp. Measure from the edge to the guide…
…set the other end of the guide. (pencil mark just shows you where the saw will really cut.)
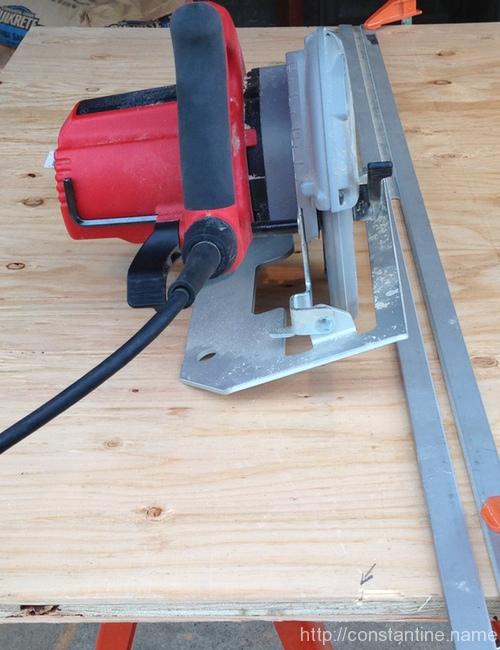
Cut along the guide. This is an example of cutting “backwards”. (Because the bevel has to be in this orientation.)
Also, near the end of the plans it describes a little about how to put the top-piece of plywood on each box. It works fine for the top/smallest box. But for the middle and bottom, the way to do it is: measure the opening of the box above, then cut the plywood sheet and screw it to the box. It might not look perfect, but if you put the plywood on so it fits nice, the box above isn’t likely to fit correctly over it.
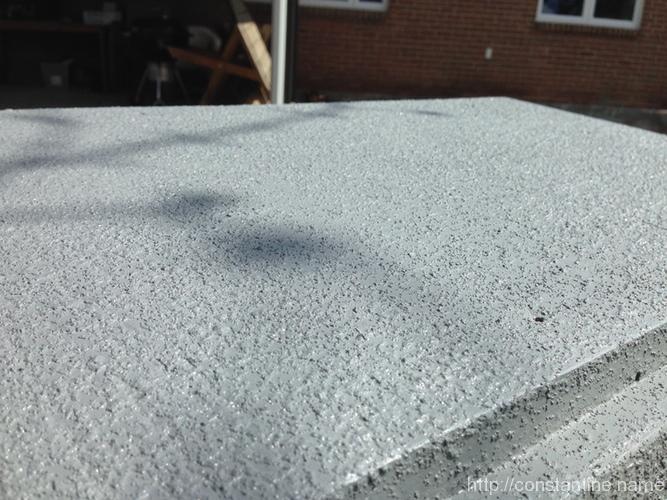
Finally, the plans, (in the notes near the back of the PDF) show how to figure out how much paint you need to paint them. We used a grey outdoor deck/porch paint, and we mixed in fine sand to give the box some traction. If you’re making artificial obstacles, may as well make them friendly too.
Specific notes
The PDF document above has notes added in red pencil:
Pages 1 and 2:
We added hand-holes for lifting. They’re not shown on these sketches.
“Bevel” means set the bevel angle on the circular saw, i.e., make the saw blade lean. Saws only bevel in one direction, so every cut in the plans has an arrow on end showing you which way to cut; This determines the orientation of the “under bite” made by the saw. { The saw we used is “right handed”, (as are most saws) the blade tips to the right, and the blade bites under to the left. Some of the cuts are difficult because the “easy” cut direction, (with the saw on the bigger part of the piece, dropping the cutoff away to the right) would produce the wrong bevel on the work. }
For cuts number ‘2’, ‘3’ (which you do twice) and ‘4’: The arrows point the wrong way; They should point to the right on the diagram so you have 3 cuts that are easy/the-right-way, and just the last one is “in the wrong direction”, against normal saw usage.
This column shows you the materials you’re using up as you go along. It just helps you keep track of everything.
Page 2:
Don’t bother stacking. Just measure, mark and cut each (‘A’, ‘B’ and then ‘C’) strip as shown.
Yes, all the strips’ edges have a 7.5° bevel on them. Yes, it really does not matter which way you have the bevel when you cut the end-angles.
Page 3:
Cut ALL of these cuts the other way. It’s easier. Cut ‘1’ just trims the sheet to put the bevel on, cut ‘2’ (5 times) drops strips off neatly. Then you turn the piece around and cut it the “wrong way”; “wrong” in terms of how you normally rest the saw and cut “off” the smaller part.
Nothing to see here.
Page 4:
This is the view of the end of the 2×4. Just run the saw along the right edge of the 2×4 steering generally straight.
Page 5:
At least 3/4″, more is fine.
Pages 10 etc:
These are just some notes from figuring out how many boxes of screws we needed. (We didn’t put the exact number of screws in. We just went with “that’s probably enough”. And we ended up using only half the deck screws.) Also some calculations of how much paint we needed to buy.
Copyright
"Vault box design 1, sloped sides"
Copyright (C) 2014 Craig J Constantine

This information is free; you can redistribute it and/or
modify it under the terms of the GNU General Public License
as published by the Free Software Foundation; either version
2 of the License, or (at your option) any later version.

This work is distributed in the hope that it will be useful,
but WITHOUT ANY WARRANTY; without even the implied warranty
of MERCHANTABILITY or FITNESS FOR A PARTICULAR PURPOSE. See
the GNU General Public License for more details.

You should have received a copy of the GNU General Public
License along with this work; if not, write to the Free
Software Foundation, Inc., 51 Franklin Street, Fifth Floor,
Boston, MA 02110-1301, USA.
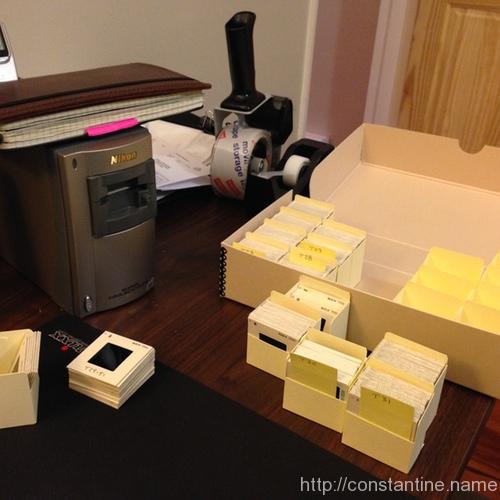
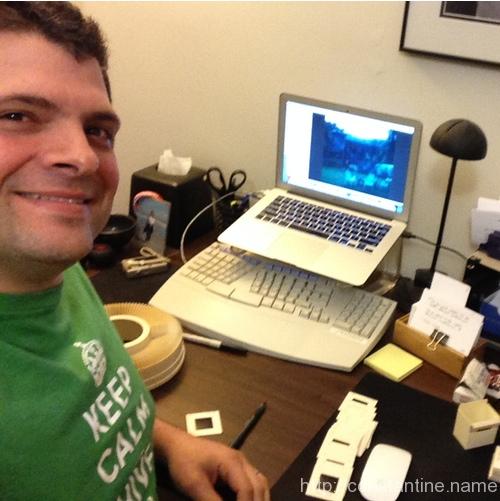
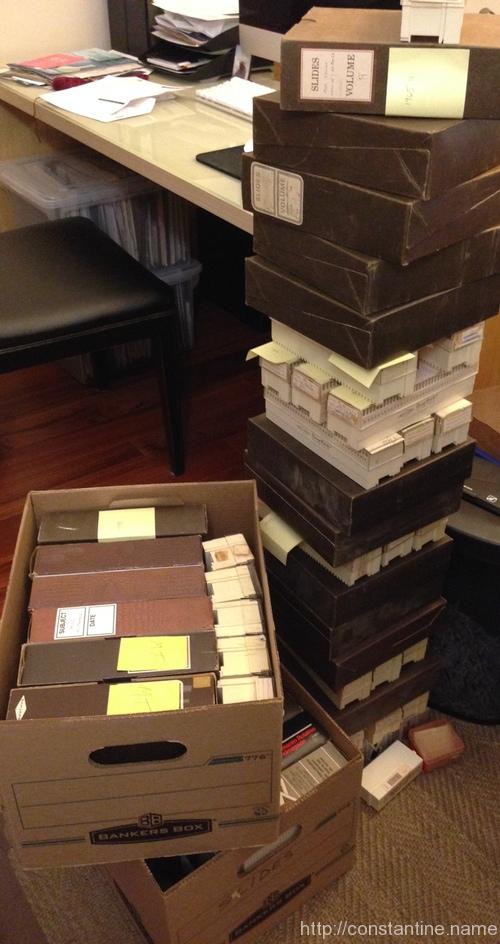
…2,600, (give or take a few hundred) mounted slides scanned!
Recently, I’ve been talking about my slide scanning project. I’ve been pouring hours and hours into feeding the slide scanner… it was like Little Shop of Horrors, “feed me Scan-more!!” for days on end. Except for a short stack of problem slides, I’ve completed the heavy lifting.
I’ve found hundreds of slides that I want to share. Stay tuned!
Aside: Where am I putting the digital files? My little Mac file server has a two drive RAID. On that Mac I run Arq, (which I highly recommend.) Arq backs-up all my stuff into Amazon’s Glacier. Glacier is dirt cheap storage; I mean dirt. cheap. They charge you a reasonable fee if you ever retrieve data from the storage service. (Get it? “glacier”. Frozen in ice, never to be used again. Unless you have a disaster, then you won’t care about a few hundred to defrost your data.)
The scanner of slides
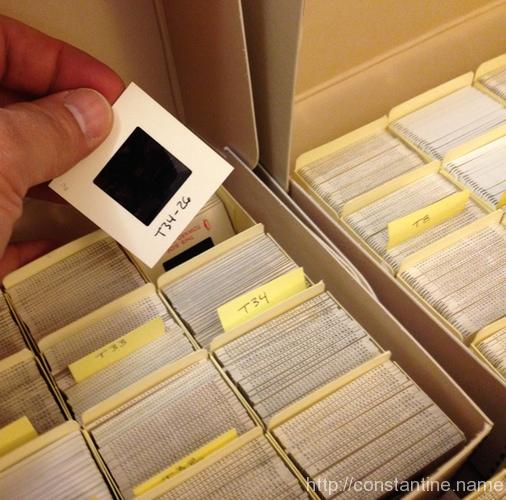
Individually labeled while unloading from their trays and carousels.
Neatly packed away so any slide can be located.
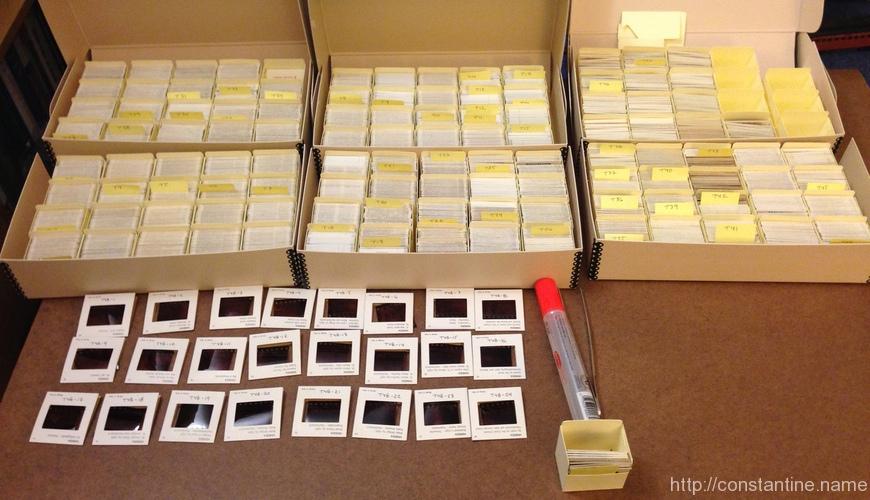
Boxes and boxes and boxes.
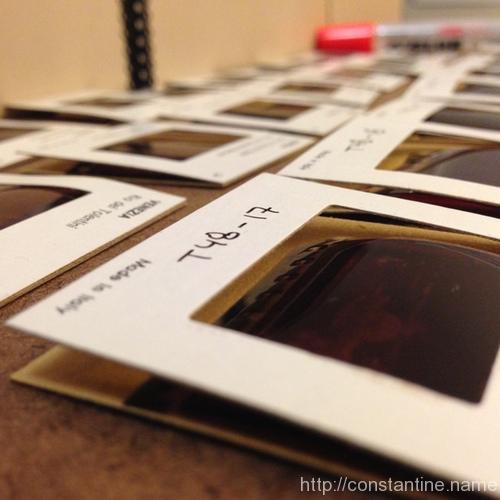
Some 50-year-old problem slides which have unmounted themselves.
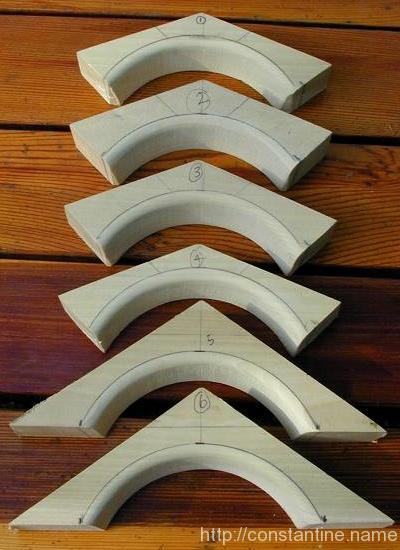
Ever wonder how they shaped the bed of the pool table where the balls fall into the pockets? Neither did I.
…until I restored a pool table from 1938-or-so. The slate playing surface has very basic geometric cuts. The four corner pockets have a very wide, two-sided notch, and the side pockets have a more narrow notch. Wooden inserts are shaped to fit into the notch, and when you cover the bed in felt, the balls roll from the slate, onto these wooden “pocket drop” shapes and fall into the pockets.
It turns out there’s a lot of discussion involved in how large are the radius of the hole — the big round part cut out of the wood that the ball falls into, as well as what the radius the balls rolls over as it falls off the cliff.
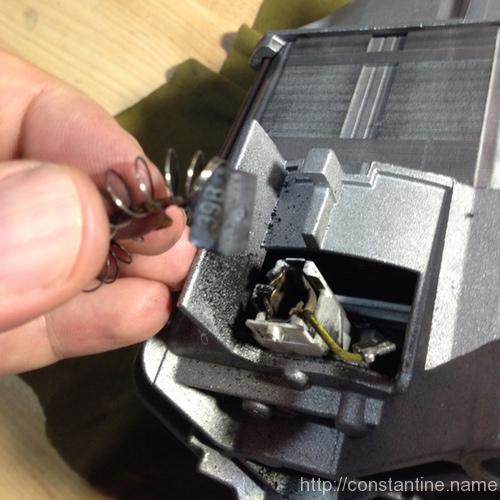
So our washing machine quit this weekend (while I was away.)
“No user servicable parts inside.”
Not this user! Tools, snip, yank. A-HAH! The commutator brushes are worn out.
This is what my dad used to spend a lot of time on… changing commutator brushes on elevators; The thing in the picture with the “39B” on it, on the end of a braided wire with a spring to push it against the commutator… It’s a block of carbon (called a “brush”) and it should be about an inch long. :*) As the motor spins, it wears down. Eventually, the length of the cable limits it moving down against commutator, no electrical contact, no motor movement. The other brush, (motor has two brushes,) was still long enough to touch.
Physics/electrical geeks: Ask me about commutator brushes some time. :^D
Internet, click click click, order via drop-ship P1, parts for tomorrow. Washing machine back in business for wednesday.