(Part 2 of 13 in series, Scaf 101)
You need about $450 for everything in the set I’m describing in this series. You’ll need a bit more if you need all the tools, and want to make the wooden “feet” too. …or a smidge less if you have the tools already and skip the feet. (But I suggest you build the feet too. You’ll be happier down the road.)
Clamps
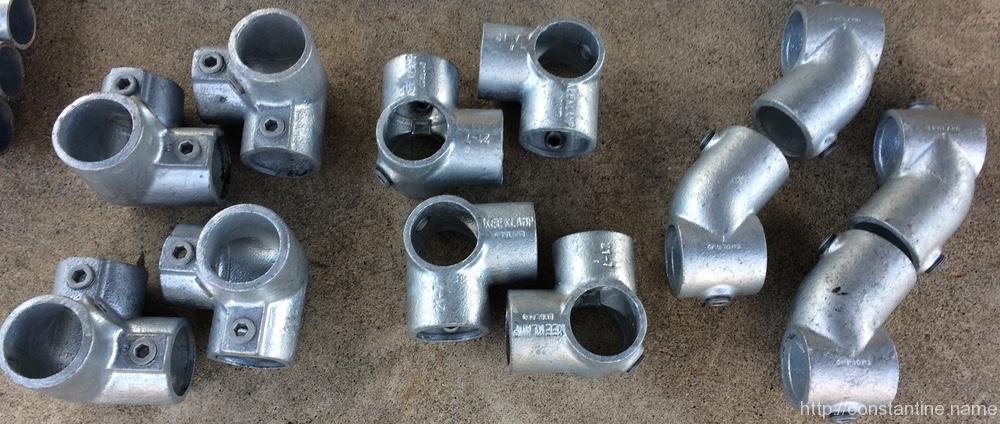
You need only 12 clamps for this set. They’re pictured below, left-to-right.
4 of Kee Safety Klamp 20-7 – “Side Outlet Elbow”, Size 7 aka 1-1/4″ Dia. $17.50 each
4 of Kee Safety Klamp 21-7 – “90 Degree Two Socket Tee”, Size 7 / 1-1/4″ Dia. $14.00 each
4 of Kee Safety Klamp 12-7 – “45 Degree Single Socket Tee”, Size 7 / 1-1/4″ Dia. $15.75 each
The best place I’ve ever found for clamps is Global Industrial. Here’s the link to the Kee Safety family of clamps:
Currently, you have to choose brand “Kee” and then choose pipe size “1-1/4” to narrow the page down to showing just the clamps you want. The 12 clamps listed above are $170 (circa Feb 2016). When they add tax and shipping, the total comes to just under $200.
Skip to the exciting part: No don’t. But I will say, if you have just a little extra money — about $65 more — buy four additional 45° single socket tees. Way down the road, in the later builds, I’ll mention, “Hey, you’ll notice you have some 1-foot pieces you’re not using in this build! If you have those extra 45°, add a brace here…”
Pipe
7 pieces of 10 foot, galvanized steel pipe, size 1-1/4″, ~$220.
(The “breakdown list” is further down explaining the lengths to cut it into.)
Pro-tip: Steel pipe is dirty, and the threaded ends have grease on them. Don’t expect to simply toss this stuff in your car. Almost all of it will fit in a trunk, but the 7′ long pieces may give you trouble.
When I first bought this pipe it was about $23, then it was $27, and most recently $29. Since this pipe is just standard schedule 40 pipe, you can call around and price shop. But remember, you need someone to cut it for you, or you have to do a LOT of hacksawing. You definitely CAN get a better per-foot cost, but you may have to buy “bundles” of pipe. As a bonus, it won’t have any threads on it. But the pipe will be longer than 10-feet lengths, and probably delivered as “freight” by a truck. Again, the whole point of this series is to get you started on the cheap. So just buying 7 pipes from Depot is the way to go. (But don’t take my word for it, call around.)
Home Depot will cut the pipe for you. The pipe is sold with threaded ends. (They receive it that way. They don’t sell it without the threaded ends.) They charge $1 to cut the pipe AND put threads on the ends. Depending on the employee, they may cut the pipe for free (since threading the ends is the tedious part). But, if they charge you $11 for the eleven cuts (see below), be happy. $11 is WAY better than hacksawing steel pipe.
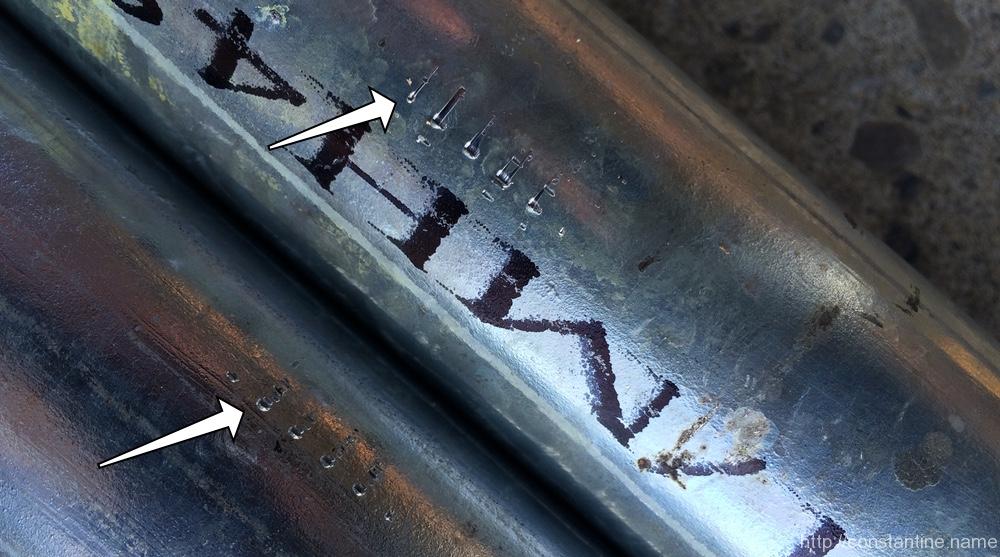
One last note about cutting the pipe. If you have Depot do it, they use a machine that grabs the pipe and spins it (it makes sense when you see it done.) The machine leaves a few little marks in the pipe. You can feel them, but they’re harmless.
Tools
You need an 8mm Allen wrench. You’ll be happier if you have more than one because your new scaf set means you’re going to have new friends who you can put to work. Does this really need explaining? …fine, here’s a photo of a hand model holding a wrench:
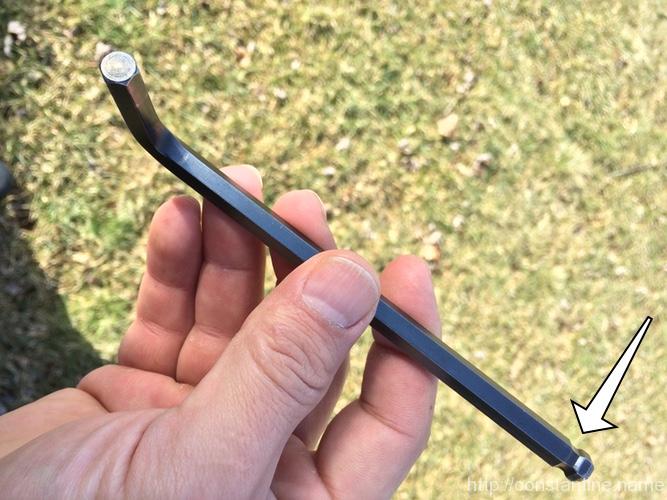
See that neck on the end of the wrench? That allows you to insert the wrench on a slight angle and spin it quickly with your fingers. Really handy to keep the upper L-bend from swinging into pipe/clamps — you’ll discover that happens ALL THE TIME, and is why people use rachet wrenches after a while of this. Seriously Craig? You took a photo of the angled Allen wrench? Yeup:
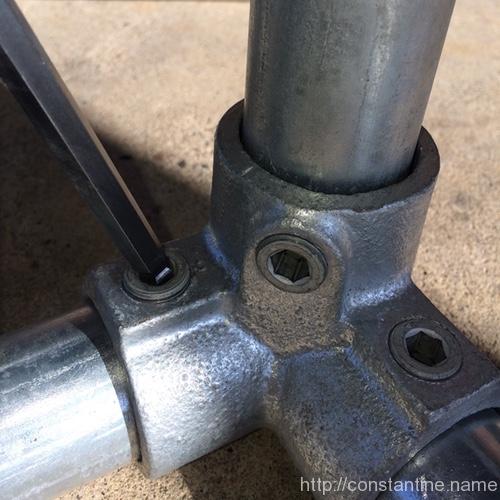
You can use a regular wrench as pictured, which has the advantage of keeping you from over-tightening the screws. The downside of this little wrench is you have to work pretty hard and it’s tedious to use.
Euphamism alert! The screws cut little pairs of curves into the pipes, making the scaf pipe look less sexy. The light marks (shown below) from reasonably tight screws I like to call “set screw kisses”, and the really deep gouges — that can sometimes cut your hand (none shown below) — from really tightened screws, I like to call “set screw hickies”. Yes, I’m a simple creature, easily amused.
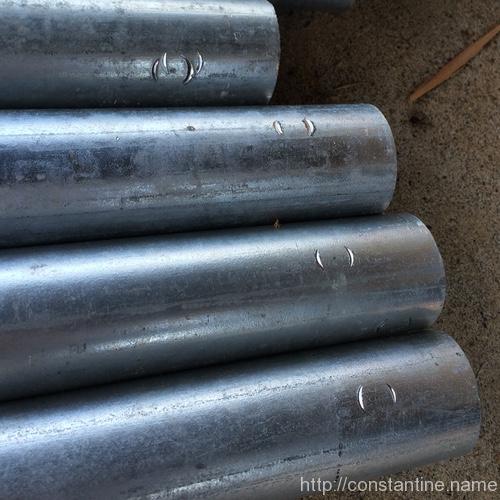
Alternatively, you can buy the Allen driver to fit into a standard ratchet wrench if you already have one of those sets. The 8mm socket attachment should come as a 3/8″ drive socket – meaning it fits the “medium” sized driver. (Some people also buy the 3/8″-to-1/2″ drive socket adapter so they can put the 3/8″ drive socket onto the large, 1/2″ drive handle.)

One last word about those set screw “kiss” marks: On the ends of the pipes, it’s not that big of a deal. The pipes will almost always be hidden inside clamps. But some of the clamps you will be positioning in the middle of the pipes. If you tighten the screws really hard, you make deep marks in parts of the pipe that you WILL be later stepping or grabbing. Experienced scaffers (did I just invent a word?) are more gentle on mid-pipe clamps, returning to snug them later, rather than tightening the daylights out of them immediately.
Break down
You need to make the following cuts. The employee at Depot is unlikely to appreciate the four, one-foot cuts. I recommend smiling, being polite and asking nicely. :)
Cut 2 pipes in half (i.e. at 5 feet.)
Cut 4 pipes at 7 feet.
Cut 1 pipe into 4 one-foot pieces, and 2 three-foot pieces.
You’ll end up with 18 pieces of pipe:
4 x 7′
4 x 5′
6 x 3′
4 x 1′
R&D digression: A bit about how I came up with this set: I have PILES of scaf and clamps. What I did was come up with small sets of parts and then figure out what I could build. I kept adding/removing/changing the pipe/clamp combinations to see what could be built. I also kept in mind that starters have to buy 10′ pipes; doesn’t make sense to go, “oh, we need just one more 4-foot piece” when they then have a 6-foot “extra”. So it’s a balance of cost, what you can cut from 10-foot pieces and how many clamps are needed. Way WAY at the end of this series I’ll mention a few places where having a few more 45-single outlets would let them add some bracing in the setups where they are not using the little 1-foot pieces. You can toss a little 1-foot angle brace in almost anywhere and it makes for bomber builds. I digress.
Extra credit: Feet
I bought a pressure treated 2×4 and made feet for the scaf. If you’re setting it up on concrete, the pipe WILL dig up the concrete when you have it set up certain ways. (The “A” frames for laché, the “railing” setup where the pipe ends rest on the ground, etc.) If you have these feet, you can just set the pipe ends in the feet.
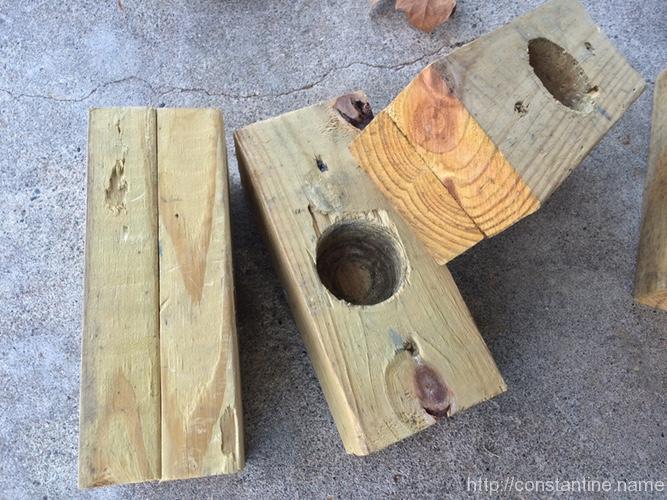
Mark out 8, 10-inch cuts on the 2×4. Use a 1-3/4″ (or whatever) hole saw to drill through 4 of the pieces. Then cut the 2×4 into pieces and screw them together. Viola!
Pro-tip: If you’re making feet, make more than 4 because the 2×4 is plenty long. You’ll use the feet down the road when you have more scaf. A lot of scaf designs I see have clamps and pipes right down on the ground to avoid the naked pipe ends resting on the floor/ground. Well, if you have feet for those pipe ends, you have a whole range of options where you move the pipes up from ground level (changing clamps of course) to give you more intermediate bar options. It will all makes sense once you are fully addicted to Pipe Culture. Anyway, if you want to go full out, make 8 feet (mark 16 10-inch pieces, drill through 8 of them) and you’ll use them on my last example setup.
ɕ