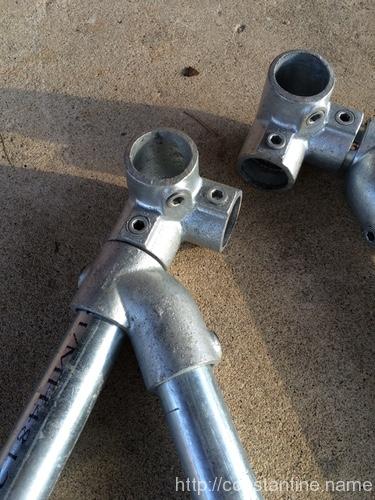
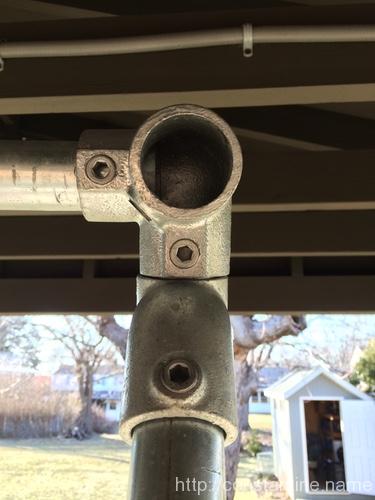
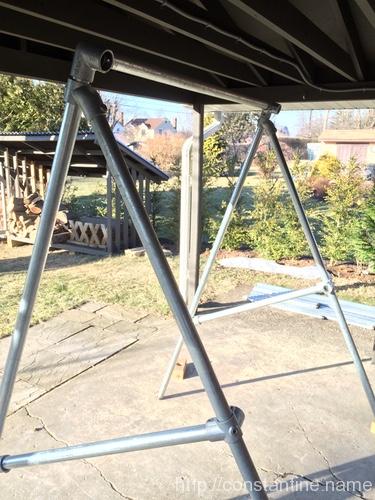
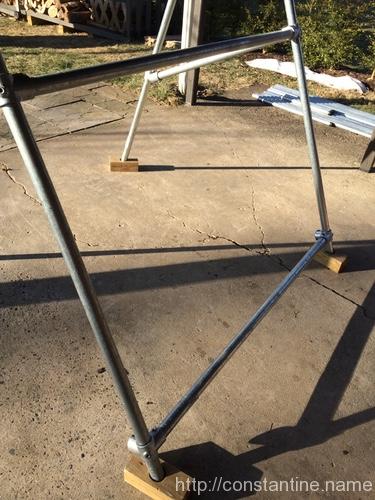
It’s not a priority

This entry is part 46 of 72 in the series My Journey

Starting today, you are no longer allowed to utter the words: “I don’t have time.” Instead, you will say, “It’s not a priority.”

~ Steve Kamb from, Why “I Don’t Have Time” Is A Big Fat Lie

Elsewhere, this is 4unebo12. — slipbox

Years ago, when I discovered the Lehigh Valley Parkour community’s inside jokes, I started avoiding the word “can’t” — if another LVPK member hears you, there’s an immediate 5 pushups penalty. (Very annoying in markets, subways, when driving, you get the idea.) Instead of saying “I can’t do that…” you start to say “I can do that when I am able to [insert something I need to work on].” Changing your words, changes your thoughts, changes your actions, changes your life.

Well, this one is my newest addition. No more “I don’t have time”; It’s all going to be, “It’s not a priority.” Go ahead, try a few of these out loud:

I don’t have time to eat healthy, becomes… Eating healthy isn’t a priority.

I don’t have time to exercise, becomes… Exercise isn’t a priority.

I don’t have time to sleep, becomes… Sleep isn’t a priority.

Oh, well brain, if you’re going to think about it that way… our whole life is going to change.

ɕ


Couple hundred at a time

This entry is part 25 of 36 in the series 10,000 Reps Project

No major changes…

Last week I did two good work days. Did the pull-ups in 5 trips to the pull-up bar over five hours, and still doing very small sets 4×3,4×2 to get me 20 reps without over-working my forearm. I’m going to stick with that plan this week. For the last workout of this week, the numbers-game will work better if I can go up to 120 reps — so that will probably be 6 trips to the pull-up bar.

Also last week, I did the 200 bar precisions in one session. It’s not physically demanding, but more of an aerobic, get-in-the-zone and work on the quality of each jump. I may do that on Wednesday, simply to move the bar precisions to be on a different day from the pull-ups.

There should have been a third workout in last week — but I was away in NYC/Brooklyn for several days (the red blocks). Huge amounts of training, and huge amounts of “hey that’s noticably better” as a result of all this body-weight work. (Also, very little sleep and scattered eating — and, hey look, I think I’m sick again :/

Anyway.

Next week there are way too many “120”s on the workbook. That’s just me moving numbers down without bothering to go farther out and reshuffle numbers (yet). I just passed the “4,000”s mile post last week, and now — FINALLY — with these sized workouts, the “5,000”s milepost is in sight. At a rate of “120”s workouts, on a work-rest-work-rest-rest pattern of days, I can still finish this all in sane fashion before the 365th day.

Screen Shot 2016-03-14 at 1.32.41 PM

ɕ


4,000

This entry is part 24 of 36 in the series 10,000 Reps Project

I passed the 4,000 reps mile-post last week! Woo-HOO! 6,000 reps to go. Booooooo!

Last week was a Herculean effort on bar precisions to dig out of the hole I created. I did 700+ bar precisions in 3 days. It was deliciously decadent to have Saturday/Sunday off from this project. (I spent the days “off” by driving 3 hours to play/train with friends in upstate NY, driving home, and then going to regular Parkour class on Sunday. “Rest” may not be the right word.)

After last week’s “no plan” plan turned out well, I’m going back to my regurlarly scheduled work-rest-work-rest-rest 5-day pattern. I’ll do 100 reps of each, and my goal (over the coming weeks) will be to bring the pull-ups closer together. Currently, I’ve been doing ~100 pullups scattered in bunches of 8’s (as 3,3,2) or 7’s (as 3,2,2) spread through the day. I’ll work on making pull-ups into larger bunches of 9’s (4,3,2), 10’s and so on. The dream being to get to 10×10 pull-ups in one workout. My right forearm/grip is feeling better, but nowhere near 100%; so I’m keeping this as an odometer race, I’m not going anywhere near max rep’s on pullups until my forearm feels 100%.

A note about handstands: I’m going to keep doing them as 15-second stands. I was increasing the time per stand, but I realize now that I need more practice on the kick up and balance. So doing lots of shorter stands gives me lots of practice. I’ve managed a few instances of 5 seconds of complete free standing after kicking up onto the wall.

Next week, I’ll consider going to 120-rep workouts. That would bring the pace up sufficiently to finish 10k well before July 20. (Alternatively, I might invite friends out for a day of hurt to try to do something crazy like 500-of-each-exercise in one sprint to the finish, but that seems risky to me.) I would LOVE to wrap this up early so I can move on to other things.

For the long view, I sketched out doing 100-rep workouts on my 5-day pattern and it now comes up short at the one-year date on July 20. Astoundingly, it comes up exactly 500 reps short. (Except for pushups which are weird now due to that one-a-day ascending pushups thing that is going on unrelated to this 10k challenge. I’ll fiddle with pushups in a few weeks when that’s over.)

Screen Shot 2016-03-07 at 8.07.57 AM

ɕ


Working on controlled precisions

This entry is part 44 of 72 in the series My Journey

Fun with controlled precisions: I finally got around letting the camera run while repeating a jump. Here’s two that I was working on yesterday. These were just a wee bit odd for me to sort out. This is the aspect of indoor gyms that I love; being able to set up something very specific. This was taken at Innate Movement Parkour -Kingston, NY.

ɕ


Trying to get back on track

This entry is part 23 of 36 in the series 10,000 Reps Project

Today I got a lot of numbers done. On the screengrab attached, I don’t have all of today’s numbers white… just a few more reps to do to finish today. But still totally slacking on the bar precisions. DAMMIT tomorrow I’m gonna get on it!!

The bar pre numbers for the rest of this week are gonzo… I know I can do them, just need to get in gear. Yellow blocks are “planned”, blue is “interesting mile post”, and red is “danger/training obstruction ahead”.

Saturday I’ll be away in upstate NY for some Parkour so I’ve cleared that day with zeros. But I suspect I’ll be tired Sunday — I’ll be driving home 3 hours, and there’s regular class in the afternoon. So I should clear Sunday as well. I’ll see if I can “bank” things. But “banking” 180 bar pre’s will not be easy.

Pushups are almost getting silly. We have this large group that converses each day with a Parkour friend who is currently in the army deployed to Afghanistan (in intelligence, not getting shot at.) Anyway, every day that he posts an “Afgan log entry”, we (most of us) do an increasing number of pushups. So you’ll see a hint of the 40, 41, 42, 43 etc in the pushups column. I just keep filling them in to make numbers, and I keep dropping/ignoring extra pushups done. So this Thursday would be 49, but I’m only recording the 45 I need to get to 4,000. Then Friday, Saturday and Sunday I’m likely to do another 50, 51 and 52 pushups. (Which I’ll ignore because I don’t need the numbers.) Anyway, weird numbers appearing in the pushups column. But it’s awesome to be like “meh. pushups. whatevs.” On Sunday, I did that 140 in 12 minutes and it was cake. Well, cake with nuts in it, but cake.  [ <– Deadpool reference :^]

Bigger picture, this means (if I can pull off this week) I only lost about 9 calendar days of slippage to my recent got-sick-and-then-became-a-slacker slide.

On the other hand, 720 bar precisions in the next 4 days… that’s probably a wee bit ambitious.

Screen Shot 2016-03-01 at 7.40.45 PM

ɕ


Some pullups

This entry is part 22 of 36 in the series 10,000 Reps Project

About 6 months ago, I was unable to do a pull-up. These five are part of 70 on the plan for today. I’ve been doing pullups for weeks now withOUT warming up. Just walk over to the bar and haul. Why gloves? At the moment,…


Scaf 101: Epilogue

Closing thoughts, other random clamps and ideas.

A fist full of clamps

Here are three more clamps. The first two you will certainly end up with, eventually. The third one is just a fun, sort of, “what would you ever do with that?”

Split cross

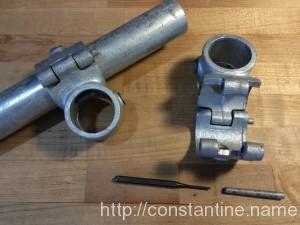
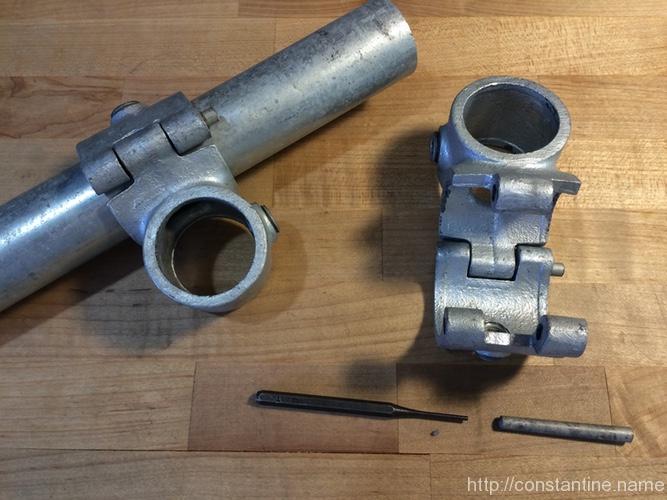
This is your new best friend, the “split cross”. This is better than sliced bread. This clamp can be opened (by tapping one of the pins out), and then placed onto an existing pipe in a structure. Note that the pins are slightly tapered. You’ll see they stick out on one side (that’s the thick end) and they are flush on the other (that’s the thin end, the end you tap).

IMG_1537

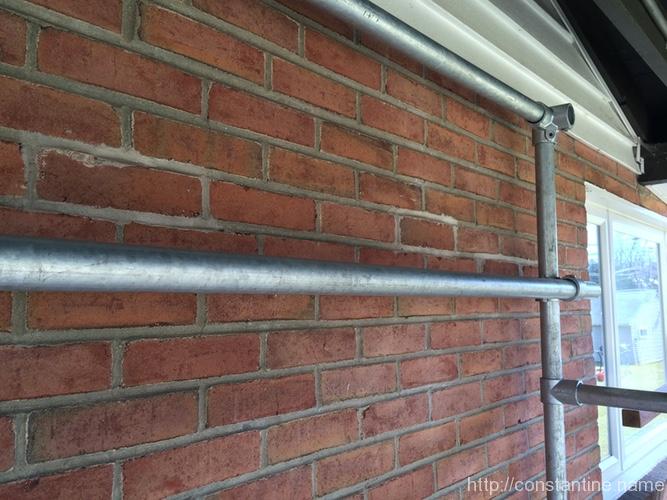
With these clamps, you can add another pipe, like this, when someone says the top one is too high…

IMG_1534

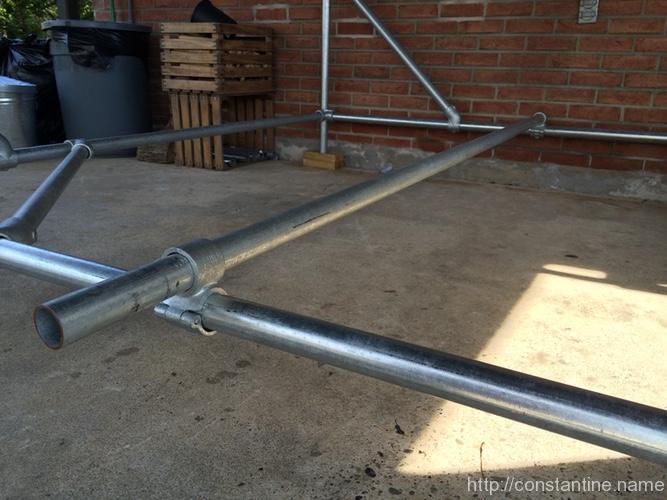
Or you can just throw a precision (or balance etc.) rail right into the middle of a build. I keep one, 10-foot-plus pipe laying around for this purpose. You can even strap on extra bars angled across the build if you bolt to the vertical poles. You can strap to two different horizontal poles, at different heights and make odd-angle slopes. There’s tons you can do with this clamp.

IMG_1533

90° single outlet

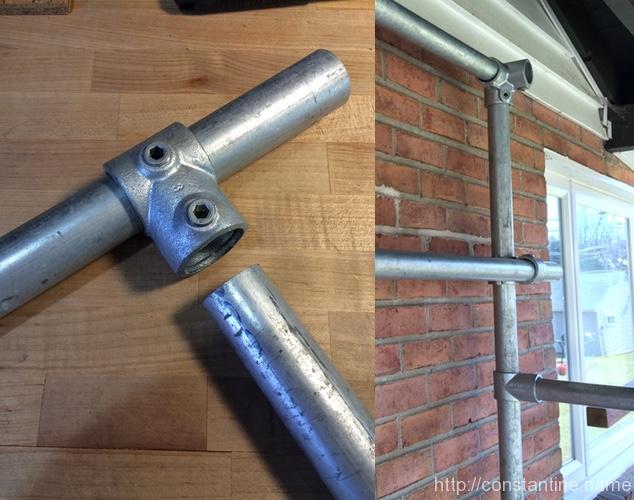
There’s a 90° single outlet tee which is handy for making really clean builds:

IMG_1536

Swivel mount

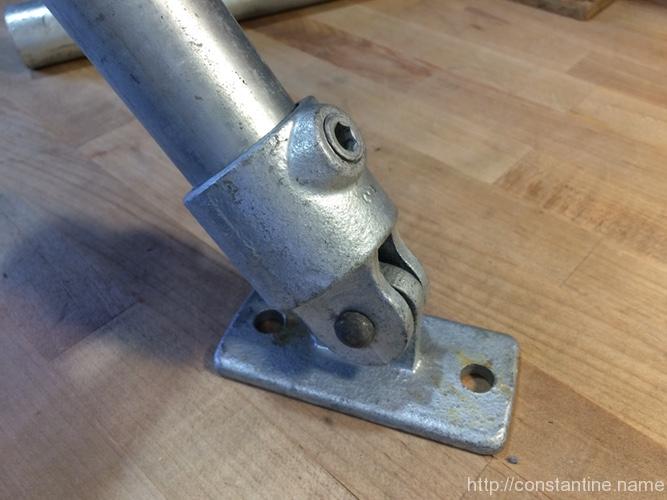
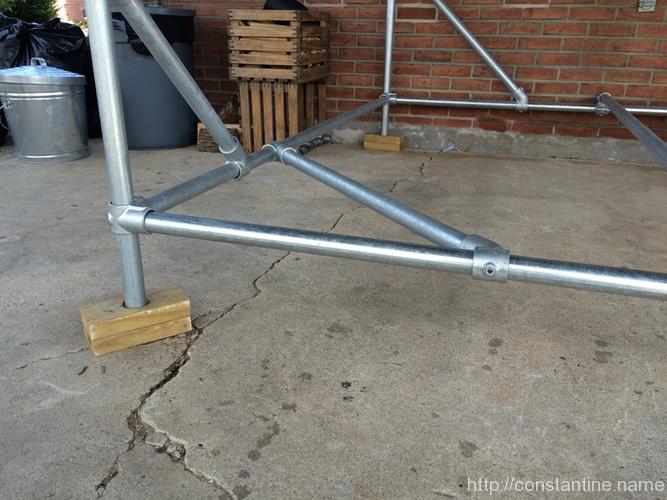
I have a few of these that I use as feet on my ground rails. Makes the pipes sit neatly on just about anything. But you could also attach these to big wooden blocks, and then use them as feet on the bottom of your scaf corners to keep it from sinking into your lawn. (Because of the set screw, these feet would move easily with the scaf when you pick it up.)

IMG_1539

The simple wooden feet are great, but in the lawn, they tend to flip over and come away when you move the scaf. So using feet that are attached to the legs would be slick.

IMG_1535

A few clamps more

Clamps are easy; point, click, ship. (Unless you’re lucky enough to live near a place that stocks them.) But as you accumulate more steel pipe, you’re going to want to start cutting it yourself.

…well, ok maybe you never end up cutting a single pipe yourself. If you buy your steel pipe from a supply house, you can just list all the lengths you want. But if you’re just going to buy a couple sticks at a time, then one day, you’re going to want to make a few cuts.

Ye ‘ol hacksaw is tedious, and the ends are never perfectly square. The gonzo method is to buy a chop saw and fit it with a metal-cutting blade. But the middle-of-the-road method is to buy a heavy duty “tubing cutter”. A steel pipe cutter will make short work of schedule 40, 1-1/4″ steel pipe. (But you will need to clamp the pipe down somehow to resist the cutter’s rotation.) For example, a “Ridgid 32820”.

The good, the bad and the clampy

I think I’ve done a reasonable job of capturing, and organizing everything (and more) that I’d wish I’d been able to find on the first day I started thinking about buying some scaf. Along the way, I had a lot of fun indulging my scaf habit and I hope you (fellow pragmatist) enjoyed reading this far.

Where to go from here? …to the clamp web sites, to the scaf supply depot, to your first scaf build party with friends!

On the other hand, if you’re in the mood to stare at your screen more, I have a #scaf tag for all the scaf posts on my site. They are mostly photos of built scaf, so perhaps you’ll find some ideas/inspiration.

Finally, a big shout out to Blake up in the Boston area for being a huge scaf-addict and spreading the scaf love. They don’t have anything scaf-specific on the web, but if you hunt them down on your favorite social medium or in real life, there’s pretty much scaf everywhere: Parkour Generations Americas Boston on DuckDuckGo

ɕ


Scaf 101: Build 6, Taller A-frame

There are some non-obvious ways to use clamps to build unusual things. Early on, in the first “cube” build, I mentioned you could do pullups and work climb-ups. But this build is way better for building a stable, nearly 7-foot high bar.

There’s no layout shot per se, but here’s a pair of assembled 45° apex A-frames. (Note that the unused outlets in the middle both face up.)

IMG_1512

There are two 90° two outlet tees in the middle of the photo, 45° tees on the left and right and 3-foot brace pipes. This looks totally asymmetric, right? Here’s a close up of the tops of the A-frames:

IMG_1513

(I know, right? Does this work?)

Here’s a detail of how you put the top cross bar into the clamps; do not over-insert the ends because we need the width to be correct.

IMG_1517

Wait, this is a thing? It totally is…

IMG_1515

Very tall, very stable for climbing/hanging and you can swing a bit (if you like sketchy swing sets).

We have 5-foot pipes and tees left, so let’s add some more side pipes:

IMG_1516

I love how the outlets on those tees we used early on, suddenly are just perfect for a cross bar. Obviously, that lower one could go anywhere on the set. If you have extra 45°s, you can add some 1-foot diagonals on any (not the top – won’t work up there) of the cross pipes. I’d put two diagonal doing down from the mid-height cross-pipe; that would give a huge stability gain without being in your way.

There are other variations to this build: You could have used 5-foot pipes for the cross-bars when you laid out the A-frames. They’d be much lower down on the sides. You’d still have the fourth 5-foot pipe to make that mid-height cross-bar. And of course in both variations you have 3-foot pipes that can be added as diagonals if you have the extra 45°s. Remember the rail precisions build, with the diagonals that were “off” but still sort-of fit? You could get a 3-foot diagonal up on the top most cross-pipe.

I really like this build. It’s a sort of “sleeper” build where you start feeling like your wasting clamps at the apex of the A-frames and then it turns into this very unusual geometry. Most scaf (except of course Blake’s scaf in Boston) ends up being all 90° and 45° systems.

ɕ


Scaf 101: Build 5, A-frame swingset

By now, you should be pretty comfortable with these builds. So for this one, I’m going to start off by making a poor decision, so you can see how it doesn’t work out at the end. Then I’ll make a change and show it rebuilt.

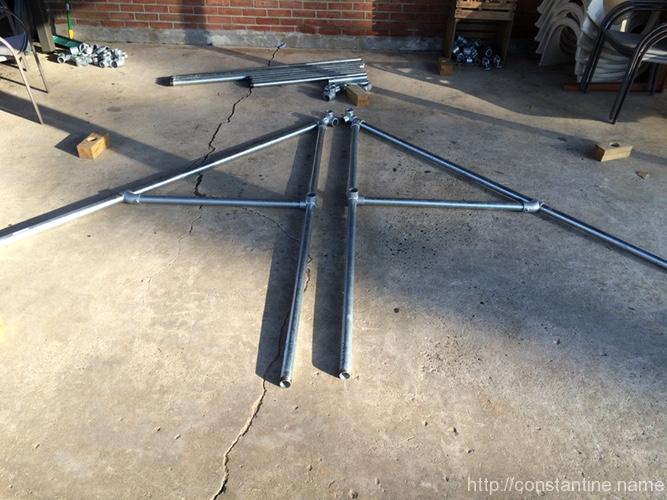
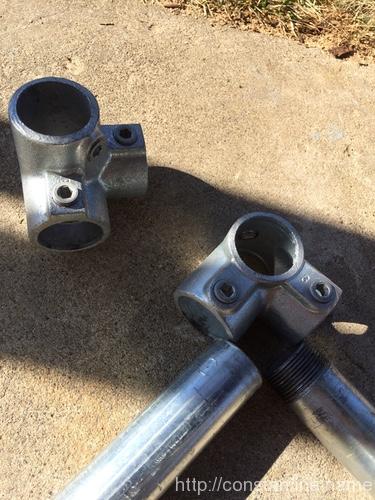
Here’s a layout shot for one A-frame end of a “swing set”. If you look at the apex closely, you’ll see I was considering using a side outlet elbow. (Two 7-foot legs, and a 3-foot cross pipe.)
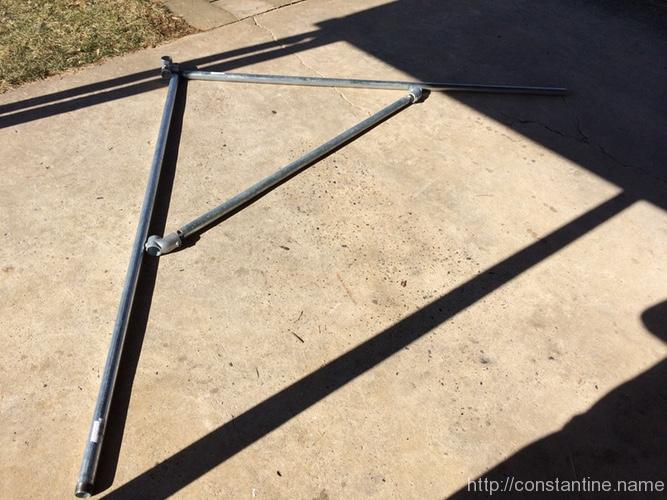
IMG_1487

At which point I thought this might be an interesting teachable moment. So I swapped in the 90° two outlet tee. This seems like a good idea right? We’re going to use a 5-foot pipe across the top, one end of it has threads, I can slide this clamp further in from the end and it’ll get a much stiffer top corner.

Advanced: If you have the extra 45° single outlet tees you could add awesome little 1-foot braces on two of the corners at the top too. But DON’T – spoiler – we’ll use the 1-foot pieces for something else at the end.
IMG_1488

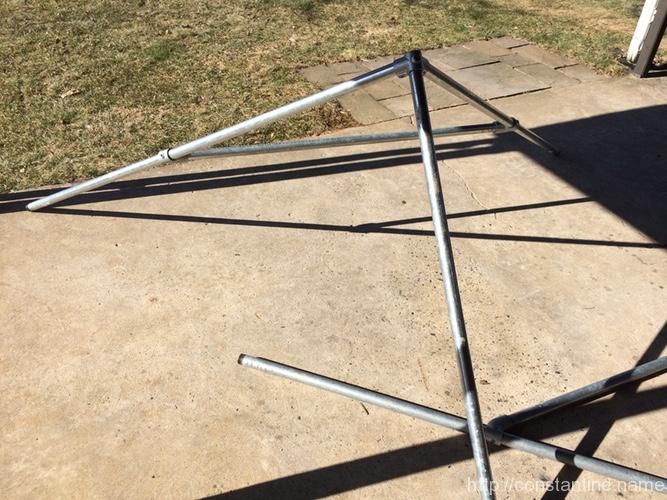
So I assembled one A-frame side and put in the 5-foot top pipe. You can see the other A-frame side is also assembled on the ground. The 7-foot pipes in this set all have threaded ends, and I’ve left them all facing down so the A-frame top clamps are more stable.
IMG_1489

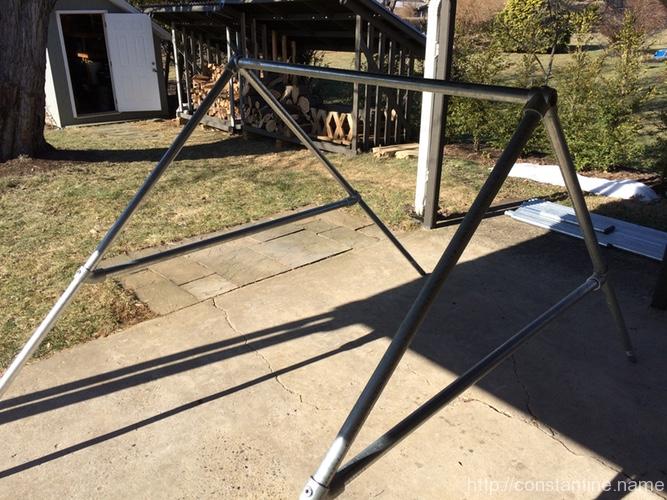
And here’s the assembled A-frame swing set. It’s about 5 feet high and is surprising stable because of the very wide 90° angle at the top.
IMG_1490

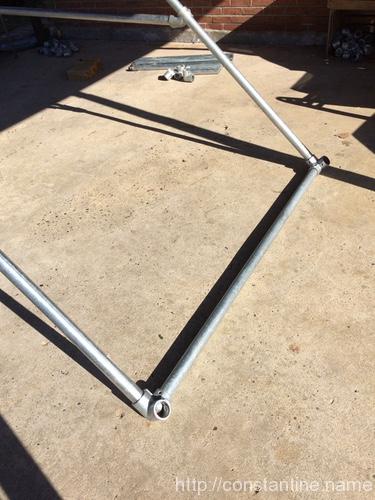
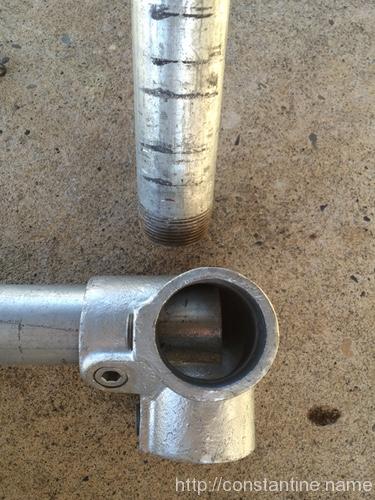
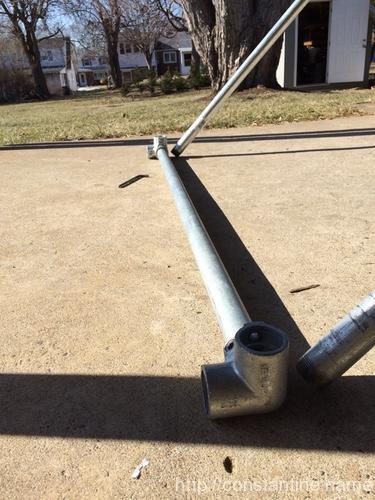
So can we make this more interesting or more stable? Let’s put a 5-foot base across the bottom of one side, just to stiffen it up. (But it can also be a laché precision target too.) Two elbows, a 5-foot pipe, and you’ll see the 5-foot seems long, so bury as much of the pipe’s ends in the clamps as you can. You get this:
IMG_1492

IMG_1493

IMG_1494

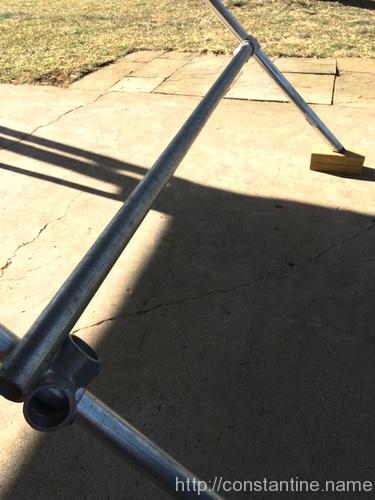
We still have two elbows left, so we could do this on the other side and call it a day. But we also have two more 90° two outlet tees, so maybe we could put a bar, across the other legs, but up higher; just to make it interesting? Here you realize that using the two 90° two outlet tees on the top of the A-frame means the entire thing is too narrow to pull this off. In the photo, I have the far side clamped, and the near side just snugged and resting so I could take the photo; it’s clearly too long. If you slid this down low, you could just stretch/spread the legs, but up at this height, it’s a no-go.
IMG_1497

At this point (if not sooner) you’d realize that you cannot get those top clamps out and swap them. You have to tear the entire thing down; thus my thought that this would be good to show, so you never have to do it. :)

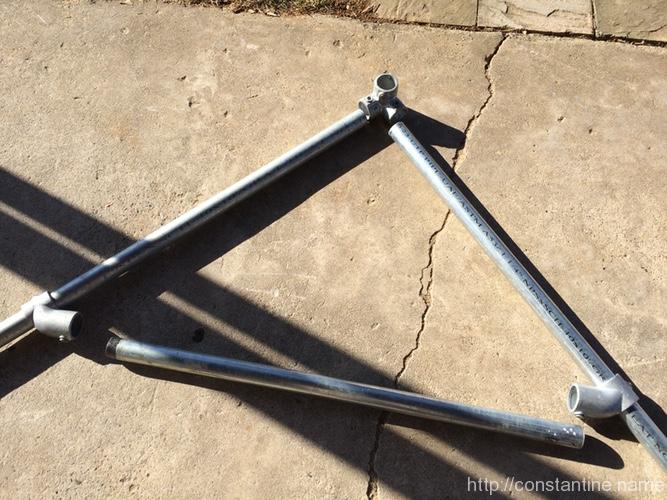
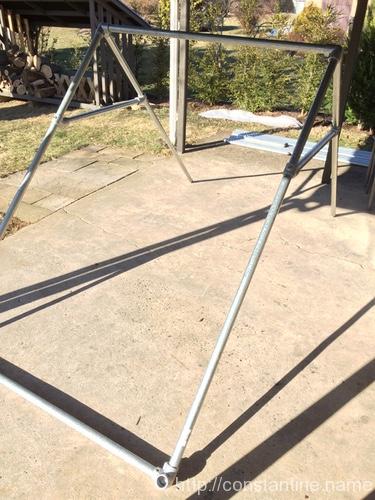
Here’s a do-over layout shot for the clamp change, and the finished do-over (with that low base with elbows installed).
IMG_1499

IMG_1505

Now we can add some fun stuff. You can use the two outlet tees (you have four left) to put a base on the other side (note the clamp orientation).
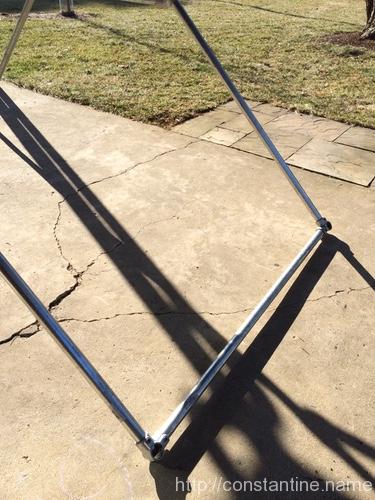
IMG_1506

But we have that on the other side already, so you can flip those clamps and position this 5-foot pipe anywhere. You have a “window” on one side too!
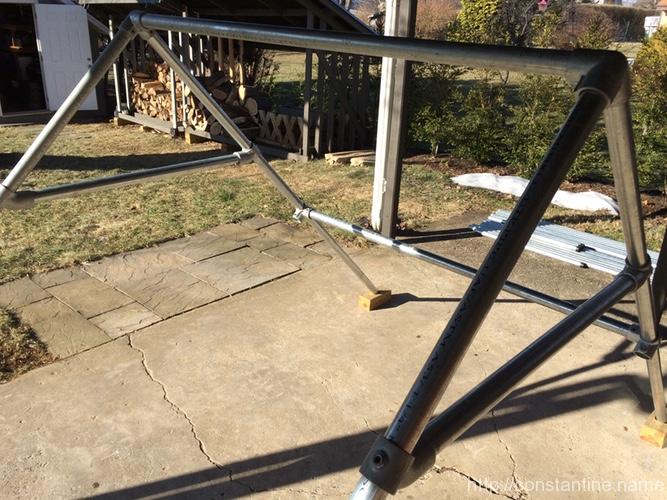
IMG_1507

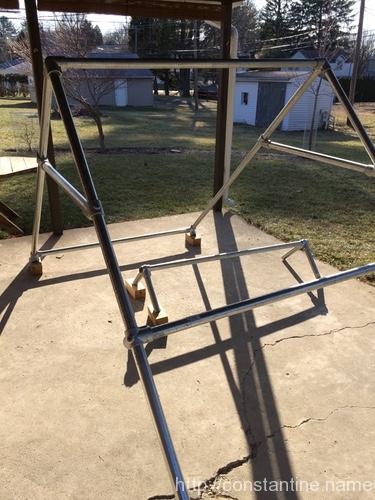
We really should flip the elbows on the other side, so they “sit” into the feet better. Now we also have a “ground rail” on one side. Perfect to start from before jumping/reaching to swing on the bar, or as a laché landing target:
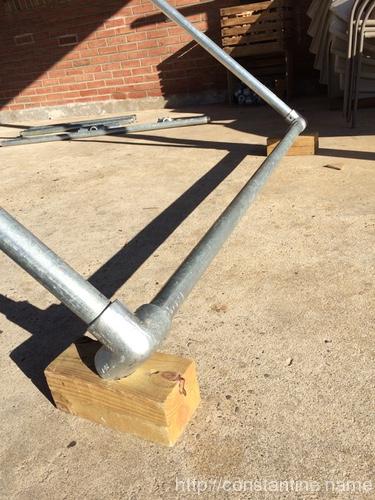
IMG_1508

Done? …not hardly! We have clamps left over. Grab that last 5-foot pipe and your four 1-foot pieces, two 90° two outlet tees, and you can make a bomber ground rail (because you made all 8 wooden feet way back when).
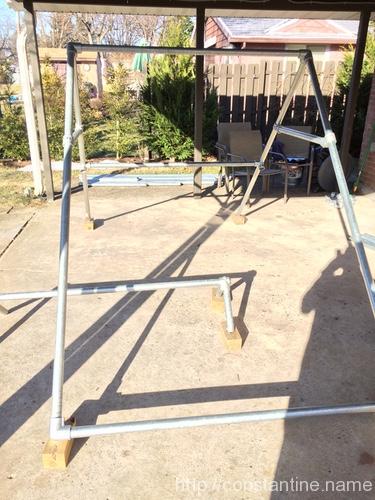
IMG_1509

IMG_1510

Finally, you still have two 3-foot pipes left. If you have the extra four 45° single outlet tees, you could add those pipes in somewhere. As diagonals to the base, or in the window, or something crazy like connecting the free ground rail to the A-frame somehow.

So this build ends up being full of options. Climbing/gap challenges around the side braces; balance/cat-on-a-rail challenges; precisions; swinging. This is one of my favorites that you can build with this set.

ɕ


Scaf 101: Build 4, rail precisions

This is a very stable, adjustable setup for learning rail precisions close to the ground.

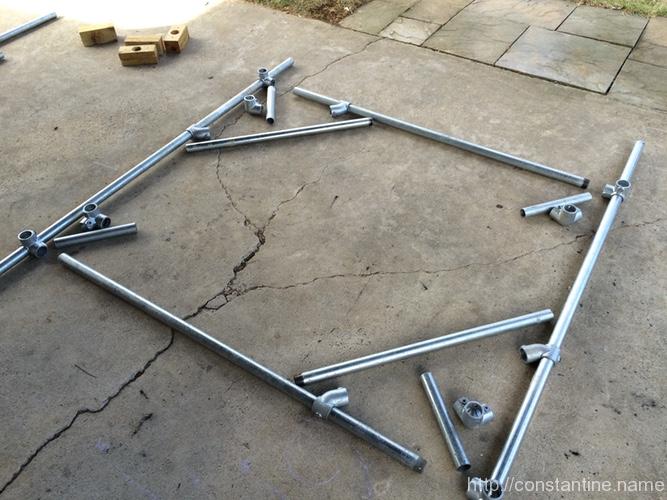
Here’s the layout shot. The 1-foot pieces will be vertical.

IMG_1453

In this build, I’m going to use 3-foot braces incorrectly; I’m going to build them out-of-plane, where all the angles are just a bit off. Turns out it’s close enough to work because the brace pipes are 3-feet long. This wouldn’t work with shorter braces. (Look at it closely when you put it together to see what I mean.)

Here are closer layout shots of the two types of corners in this build. First, a corner with a brace:

IMG_1454

…and the corners without a brace. The upper clamp that holds the precision rail has an extra outlet we won’t be using.

IMG_1455

Put the 90° two outlet tees on the 7-foot bases. This is a little trick to make the pair on each pipe have matching alignments. This also makes their set screws super easy to tighten. Set the distance between the clamps (on each pipe) to be the distance of the precision you want to end up with in the finished setup.

IMG_1456

Put all the verticals in place. Since each of the elbows has an outlet I’m not using, I’ve turned them out/away from the jump-gap.

IMG_1457

Put the cross bars (the ones you’ll jump on) in place, and build the 3-foot braces. You can adjust the distance by loosening 3 set screws and sliding one side. (Another spot where you can use the wooden feet to prop up the ends of the 7-foot base pipes so yo can get at the set screws that are on the ground.)

IMG_1464

Minimum is about 2-feet, limited by the angle braces:

IMG_1462

IMG_1463

…maximum is nearly 7-feet. If you never plan on going out to seven feet, you could also do the build using the other 5-foot pipes as bases. (Sorry about all my other scaf pipe sneaking into the shot. All of these builds I’m doing with just “the set” described in the beginning.)

IMG_1465

ɕ