Day One
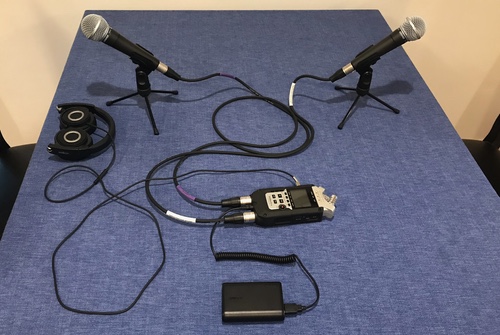
Zoom H4N recorder, a pair of SM58s (didn’t even have pop filter foam covers) with table-top mic stands. I went to the trouble of finding a power cord that matched the Zoom’s bayonette jack (on the chin at the left, between the XLR cables) and had a standard USB plug on the other. This of course only worked because the Zoom would accept 5v DC. One pair of Vogek folding headphones for me. Stand USB battery brick. I kept this all packed into a Pelican case much smaller than a shoebox.
Day Two
Pop filters — definitely need to add those.
Mic stand extensions — I found some three-inch long tubes that fit the Shure mic holders and the little folding stands. This took almost all of the “slouch” out of me and guest.
2nd pair of headphones — Things are massively better once you give the guest headphones. I carried (still do) the tiny pair of Monster brand headphones in the photo, but let the guest plug in whatever they wanted (ie, their favorite pair if they had headphones when I showed up.)
Headphone splitter — New, short cable in the photo coming off the H4N that splits into two headphone jacks so the guest and I can plug in.
This kit was terrific and I used it for about 20 interviews.
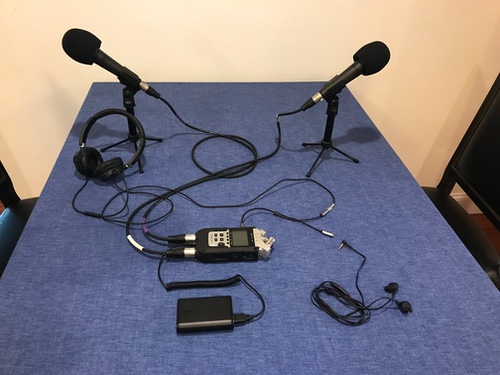
Going Hand-Held
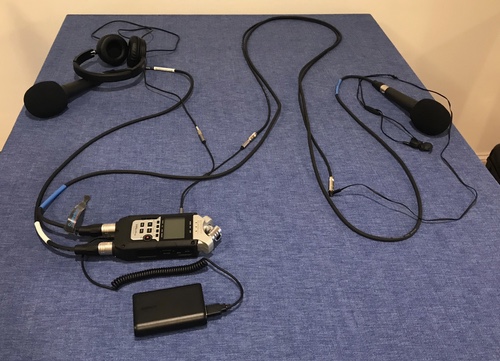
Eventually I encountered a scenario where we didn’t have a table to put between us. I got a longer XLR cable (blue markers to mic on the right) and a simple headphone cord extension. The extension is the right length so the mic and headphones for the guest are the same basic length. This let us lounge near each other. More flexibility with only a tiny bit of additional cables and it fit in the same Pelican case I was using.
Four Channel Recording
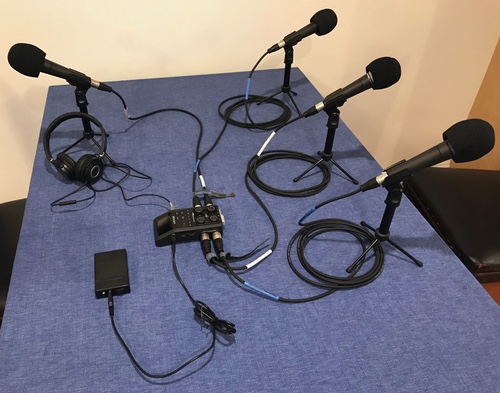
And then one day, I needed to interview three people at the same time.
I bought a Zoom H6. (Still using this today—this thing is amazing.) With two more XLR cables, two more stands (with extension tubes) and two more SM58s. We’re in business with four people talking at the same time.
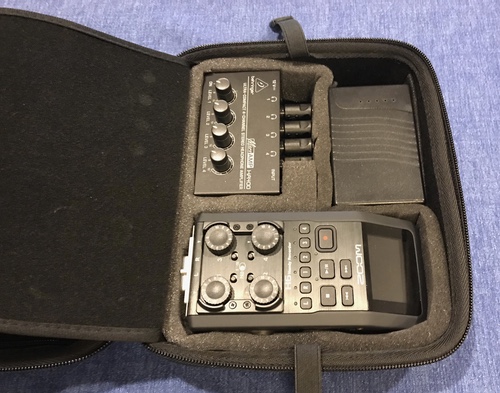
This Zoom has a USB port on the side that can always be used to power the device. (The H4N has a USB port, but you can only power the device that way when using it as an audio interface. So I had to power the H4 from it’s 5v input bayonette jack on its chin.) That’s also a different power brick (see below), but in this photo I’m just pointing out it drives the H6 via the brick’s standard 5V USB port.
Guests Need Headphones
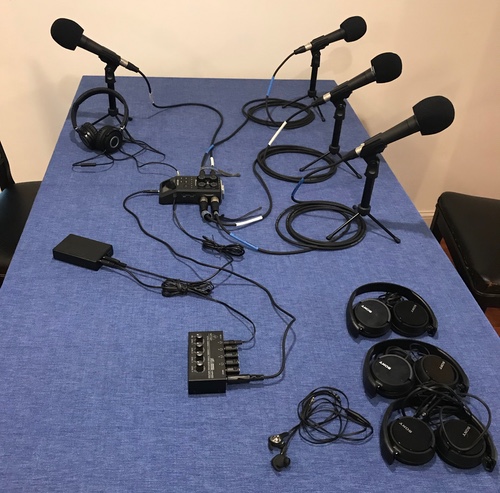
Then things got complicated. Here comes an entire (albeit tiny) powered headphone amp with separate volume controls.
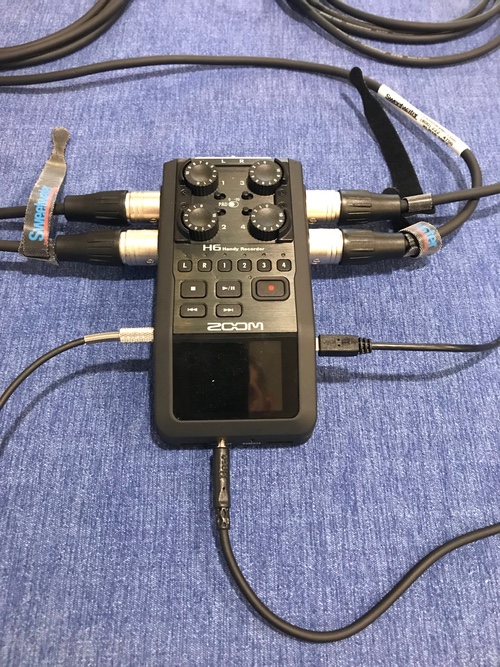
Here you can see my headphones (lowerleft) plugged straight into the recorder where I have my own volume control. Off the chin (bottom) of the H6 is a “line out” (no volume control on this line out) audio jack which runs over to the input on the headphone amp.
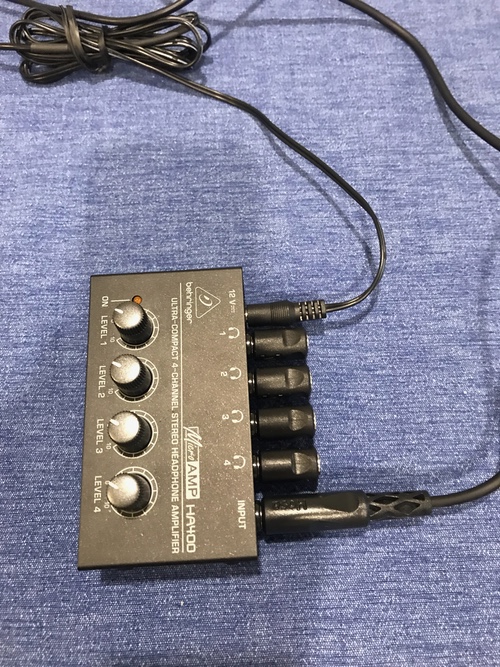
There are four 1/4″ to mini adapters plugged into the amp so I can drive the more usual mini-sized headphones from the amp’s more standard 1/4″ jacks. As a bonus, the production assistant can now have headphones too. 3 guests, +1 person, on the external amp.
The amp unfortunately takes 12v power on a bayonette jack. I do not want anything plugged into wall power. I don’t want to be cord-length restricted, nor do I even want to require power. (Outside? no problem, done it often.) Also, anything plugged into a wall outlet brings our enemy 60-cycle line buzz. So I had to custom make the male-to-male bayonette cable from the headphone amp to the power brick. So, here’s the new power brick from the last photo, which has both 5v USB and a 12v bayonette. It has a special bayonette power brick for charging over-night between uses.
This add a lot of complexity as now I have to walk the guest through playing with their volume level. It has to be loud enough for them to hear, but I have to make sure they are using the mic correctly—if they sound quiet to themselves I want them to get cozy with the mic. So I set up my mic give them headphones and I talk at the right level (voice volume and mix proximity) and have them set the volume from my voice. Then they leave it set and it “encourages” them to use mic tech to get their voice loud enough.
Now Travel
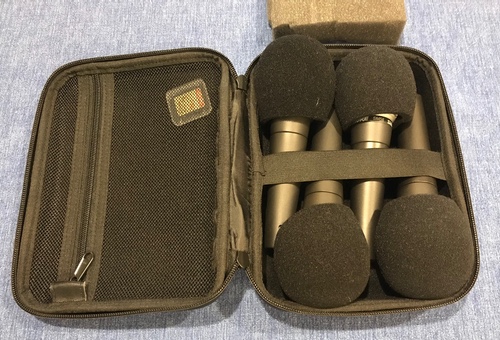
Put the mics in here. (Note my emergency backup memory card there.)
The power brick, headphone amp and H6 go in here. I spent some time to add some scissored foam. These aren’t crush-proof cases—this is only meant to survive normal travel/back-packing handling.
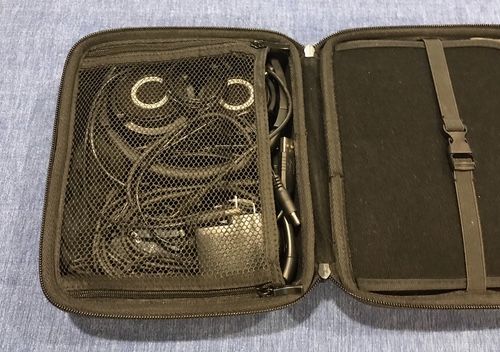
Little messy, but that’s three headphones (two fullsize folders, and the third in-ear pair.) All the power cables, and the power brick wall adapter. Also, I’m still carrying the single headphone cord extension in case I want to go in “lounge mode” needing extra distance.
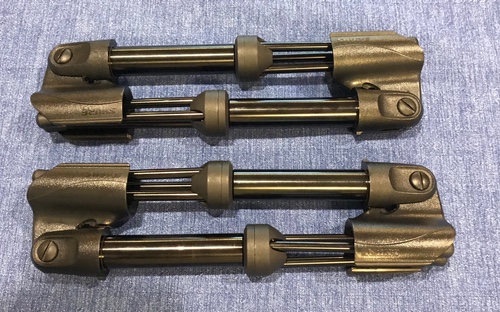
I had to do a bit of cutting to remove a little angle brace on these stock Shure mic holders. But then they fold a full 90° and nest like this. Yes, I’m a child of Tetris.
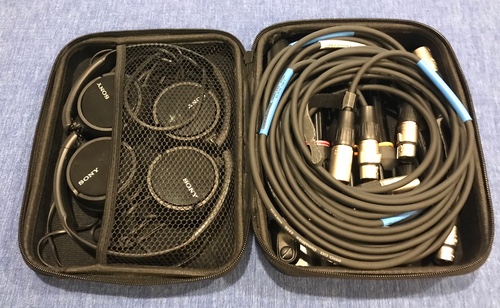
On the left are the 3rd and 4th pairs of folding headphones. The stands are in the bottom on the right under all the coiled XLR cords. This, by the way, is the case the TSA seems to be 50/50 on… I’ve been stopped, and the inspecting agent looks at the screen sees the microphones and goes, “podcasting equipment, why did they flag this…”
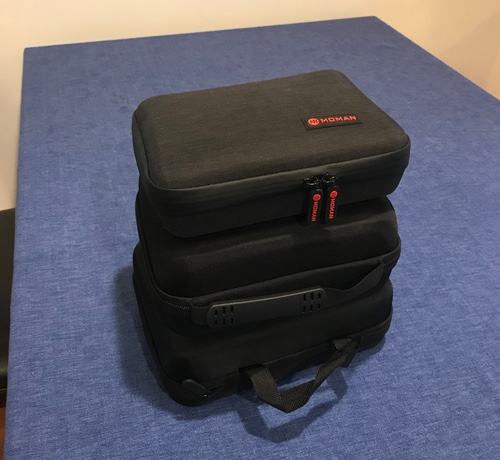
All of that is in here. The guests often enjoy the show where I produce all this stuff out of the containers and then make it all magically go back in.
ɕ